Spending over $7.00 per pound on a brisket only to serve a platter of dry, crumbly beef is a failure of technique that no pitmaster should endure. With beef prices up 13 percent this year, every cook carries a significant financial risk. It’s frustrating to invest 12 hours of your time only to wonder why did my brisket turn out dry when the internal temperature seemed correct. You aren’t alone in the struggle to distinguish between a piece of meat that’s undercooked and one that’s simply been stripped of its moisture through poor heat management.
This guide identifies the exact technical errors that lead to failure and provides the professional methods required to ensure a moist result every time. You’ll master the science of rendering intramuscular fat and collagen into rich gelatin. We’ll also cover the importance of stable temperature control using high-performance fuel and the critical difference between the USDA safety minimum of 145 degrees and the 203 degree sweet spot for quality. Expect a straightforward breakdown of how to achieve a consistent melt-in-your-mouth finish on every cook.
Key Takeaways
- Differentiate between undercooked toughness and overcooked crumbliness to accurately diagnose your cook’s failure.
- Learn how selecting the right beef grade and using clean-burning hardwood lump charcoal prevents moisture loss from the start.
- Determine the best way to handle “The Stall” using professional wrapping techniques that protect the meat’s bark and internal juices.
- Pinpoint the exact technical failures behind the question “why did my brisket turn out dry” to ensure your next 12-hour investment pays off.
- Master the essential resting period and slicing angles that keep the moisture inside the meat rather than on the cutting board.
Diagnosing the Failure: Was Your Brisket Overcooked or Undercooked?
A failed cook is a learning opportunity, but only if you can identify the mistake. When people ask why did my brisket turn out dry, they usually assume they cooked it too long. This is a common misconception. Dryness is a symptom of two opposite problems: undercooking and overcooking. To master the Brisket, you must learn to read the meat fibers rather than just the clock.
Dry and tough meat indicates an undercooked product. In this state, the collagen and connective tissues are still intact. They hold onto the muscle fibers tightly, preventing any moisture from being perceived by the palate. Conversely, dry and crumbly meat is the signature of overcooking. You have successfully rendered the fat, but you kept the meat on the heat so long that the muscle fibers completely disintegrated. It loses its structure and eats like a dry pot roast rather than professional barbecue.
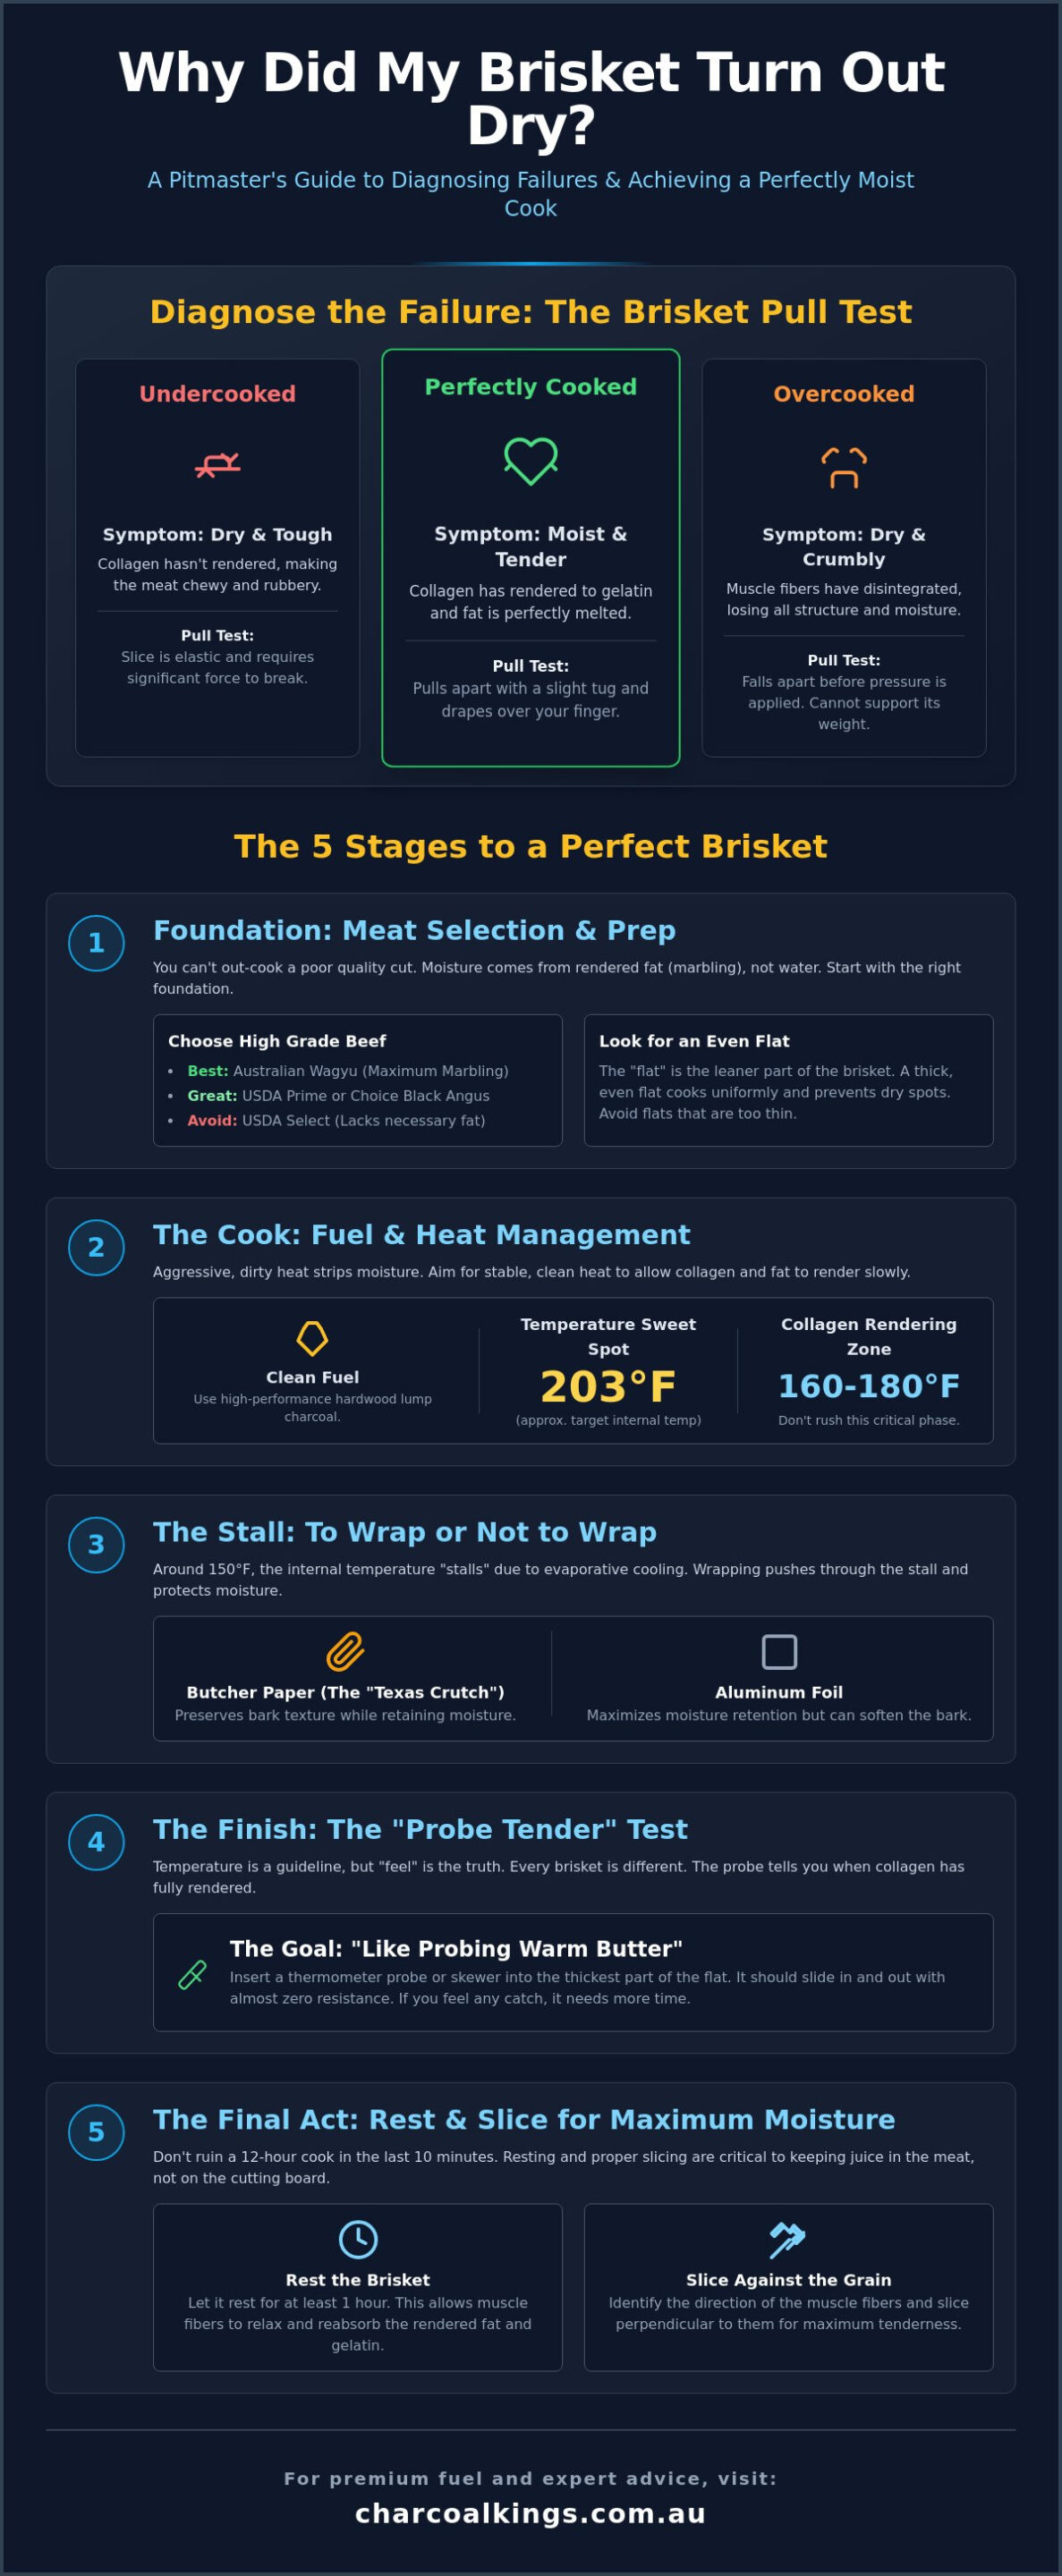
The “Pull Test” is your primary diagnostic tool for future improvement. Take a slice about the thickness of a pencil and pull it gently from both ends.
- Undercooked: The slice is elastic. It requires significant force to break and has a rubbery, chewy texture.
- Perfect: The slice pulls apart with a slight, clean tug and drapes over your finger without breaking.
- Overcooked: The slice crumbles or falls apart before you even apply pressure. It cannot support its own weight.
Internal temperature is a data point, not a definitive answer. While 203 degrees Fahrenheit is the common target, every animal is different. Some briskets finish at 198 degrees; others need to push to 205. If you rely solely on a thermometer without checking the “feel” of the meat, you will eventually produce a dry result. Temperature tells you when to start paying attention, but the texture tells you when to stop cooking.
The Science of Collagen and Rendering
Connective tissue doesn’t just disappear. It transforms into gelatin within a specific temperature window, typically between 160 and 180 degrees. This transformation is a function of both time and temperature. Rushing this stage with aggressive heat might get you to your target internal temperature faster, but it prevents the rendering process from ever completing. High quality intramuscular fat, or marbling, acts as a moisture buffer. It provides the “melt-in-your-mouth” sensation that masks the lean nature of the muscle fibers. Without successful rendering, that fat remains hard and unpalatable.
The Probe Tender Test
Professional pitmasters use the probe tender test to determine the exact moment of readiness. Take a temperature probe or a thin wooden skewer and insert it into the thickest part of the flat. You are looking for a sensation described as “warm butter.” There should be zero resistance. If the probe catches or feels like it’s piercing a rubber ball, the collagen hasn’t fully rendered. Always test the flat. The point is naturally more tender due to higher fat content and can give you a false reading of total doneness. When the probe slides in and out effortlessly, the meat is ready to rest.
The Meat and Prep: Why Quality and Trimming Matter
You cannot out-cook a poor piece of meat. Many beginners ask why did my brisket turn out dry despite following a recipe to the letter. Often, the failure began at the butcher counter. A lean, supermarket-grade brisket lacks the intramuscular fat required for a successful 12-hour smoke. Understanding the science of juicy brisket reveals that moisture in professional barbecue comes from rendered fat and gelatin, not water. If you start with a Select grade cut or one with minimal marbling, you are fighting a losing battle before the first spark.
Selecting the right grade is a non-negotiable step for professional results. Australian Wagyu provides an abundance of marbling that acts as an insurance policy against high heat. Black Angus is a reliable standard, but you must ensure it is Choice or Prime grade. Leaner cuts will inevitably result in a texture that resembles sawdust. Beyond the grade, the physical shape of the meat dictates how heat interacts with the muscle fibers. An uneven brisket leads to uneven cooking, which is a primary reason why did my brisket turn out dry in some spots while remaining tough in others.
Choosing Your Cut Wisely
A whole packer brisket consists of two distinct muscles: the point and the flat. The point is fatty and forgiving, while the flat is lean and prone to drying out. When buying from a butcher, look for a thick, even flat. A flat that tapers off into a thin edge will overcook and turn into “pot roast” long before the thicker center is ready. You must also identify and remove the silver skin. This thin, pearlescent membrane does not render down; it creates a literal barrier that prevents rubs from penetrating and results in a poor mouthfeel.
The Art of the Trim
Trimming is about more than aesthetics; it is about thermodynamics. You should leave exactly 1/4 inch of the fat cap to protect the meat from direct heat. This layer acts as a heat shield during the long cook. You must also remove “hard fat,” which is the dense, waxy fat that will never render. Removing it allows the heat to reach the meat fibers more efficiently. Using high-quality BBQ accessories like a sharp boning knife ensures a cleaner prep and prevents ragged edges.
Aim for an “aerodynamic” shape by rounding off sharp corners. Heat is attracted to points and edges. If your brisket has square corners, they will catch more heat and turn into dry, bitter “burnt ends” that were never intended. A smooth, rounded brisket allows airflow to move evenly over the surface, creating a consistent bark and internal temperature. Investing in quality equipment for your prep station is the first step toward achieving a competition-level result.
Fuel and Fire: How Clean Heat Preserves Moisture
Heat management is the foundation of professional barbecue. If you are asking why did my brisket turn out dry, the answer often lies in your firebox. Inconsistent heat and poor fuel quality are silent killers of moisture. High-performance cooking requires a fuel source that provides stable, predictable energy over a 12-hour duration. You cannot expect a tender result if your fire is a constant battle of spikes and dips.
Using premium hardwood lump charcoal is non-negotiable for serious pitmasters. Unlike inferior fuels, pure hardwood lump contains no additives or chemical binders. These additives produce “Dirty Smoke”, a thick, acrid cloud that deposits a bitter, grey film on the meat surface. This film doesn’t just taste bad; it creates a dry, leathery bark that ruins the eating experience and masks the internal juiciness. Clean heat is the only way to protect the integrity of the beef.
Stability is the second pillar of moisture preservation. Temperature spikes cause the muscle fibers to contract rapidly. This contraction acts like a sponge being squeezed, forcing out the internal juices before they have a chance to render. Maintaining a steady 225 to 250 degree environment in an offset smoker ensures the rendering process remains gradual. Smooth airflow is critical. If the fire is choking, the smoke becomes stagnant and the temperature drops. This forces you to overcompensate with more fuel, leading to more spikes and further drying out the exterior of the meat.
Lump Charcoal vs. Briquettes for Brisket
Hardwood lump charcoal is superior because it maintains a more robust coal bed. Pure carbonized wood burns cleaner and longer than standard briquettes. The absence of chemical additives ensures the natural flavor of the beef remains the focus. Managing a 12-hour cook is simpler with lump because it responds faster to airflow adjustments. It allows you to maintain heat momentum without the ash buildup that chokes out smaller fires. Excess ash from briquettes can block air intake vents, leading to the temperature dips that ruin your texture.
The Role of the Water Pan
Humidity is a pitmaster’s best friend. A water pan creates a moist environment within the cook chamber, which slows down surface evaporation on the meat. Place the pan between the firebox and the brisket to act as a heat deflector. In smaller grills, the water pan helps stabilize temperature swings by providing thermal mass. This humidity keeps the bark pliable, preventing it from turning into an impenetrable, dry shell that prevents you from seeing why did my brisket turn out dry in the first place.
The Stall and the Wrap: Protecting the Meat
The “Stall” is the most dangerous phase of any cook. Around 160 degrees Fahrenheit, the meat begins to sweat. This evaporative cooling stops the internal temperature from rising for hours. If you leave the meat exposed for too long during this phase, you lose critical moisture. This is a common answer to why did my brisket turn out dry; the cook lasted too long without protection. You must intervene to preserve the internal juices before they evaporate into the air.
The “Texas Crutch” involves wrapping the brisket tightly in heavy duty aluminum foil. This traps all steam and heat, powering the meat through the stall in record time. However, foil can over-soften the bark and give the meat a “pot roast” texture if you aren’t careful. For those seeking a professional finish, pink butcher paper is the standard. It’s breathable enough to let smoke in and steam out while still protecting the meat from the drying effects of direct airflow.
Advanced pitmasters often use the “Foil Boat” method. This involves wrapping only the bottom and sides of the brisket, leaving the top bark exposed. It allows the meat to sit in its own rendered fats while the top continues to develop a crunch. Adding rendered beef tallow before wrapping is another professional secret for maximum lubrication. These methods provide a safety net for the lean muscle fibers of the flat.
When to Wrap: Bark vs. Temp
Don’t wrap based on a timer or a specific temperature reading. Use visual cues. The fat must be rendered and yellowed, not white and hard. The bark should be “set,” meaning it doesn’t rub off when you touch it. Perform the scratch test. Use your finger to gently scratch the surface. If the seasoning stays on the meat, it’s ready. Wrapping too early results in a grey, unappealing surface and a lack of smoke flavor that ruins the professional profile of your BBQ.
Paper vs. Foil: The Great Debate
Foil is an absolute barrier. It’s efficient but risky for your bark. Butcher paper is the professional choice because it preserves the crunch while locking in the moisture. A “naked” cook, where you never wrap, produces the best bark but carries the highest risk of failure. If you’ve ever wondered why did my brisket turn out dry after a 14 hour cook, the lack of a wrap is often the culprit. To ensure your fire stays clean and consistent for these long durations, source your fuel from Charcoal Kings.
The Finish: Resting and Slicing for Success
Slicing a brisket immediately after it leaves the heat is a guaranteed way to ruin a 12-hour cook. You’ve managed the fire and pushed through the stall, but the final hour is where most hobbyists fail. If you’ve ever wondered why did my brisket turn out dry despite feeling tender on the grill, the lack of a proper rest is the likely culprit. When you cut into hot meat, the internal pressure forces the juices to evaporate instantly as steam. You end up with a puddle on the board and a dry, grey slice of beef.
Remember that meat continues to cook after you pull it from the smoker. This carry-over cooking can raise the internal temperature by another 5 to 10 degrees depending on the thickness of your wrap. If you pull the meat at 203 degrees and immediately put it into a tight, insulated environment, it may overcook and become crumbly. Pulling slightly earlier and allowing the meat to vent for 10 minutes before the long rest prevents this common error. This ensures the rendering process stops before the muscle fibers disintegrate.
The Importance of the Long Rest
Professionals in the Australian BBQ scene often rest their meat for four hours or more. This isn’t just about cooling down; it’s about redistribution. An insulated Esky or a low-temperature oven set to 65 degrees Celsius (150 degrees Fahrenheit) provides the perfect environment. During this time, the muscle fibers relax and reabsorb the rendered gelatin created during the cook. You should aim for an internal slicing temperature of approximately 140 degrees Fahrenheit. This temperature ensures the fat remains in a semi-liquid state without the meat being too hot to handle or too cold to enjoy.
Mastering the Slice
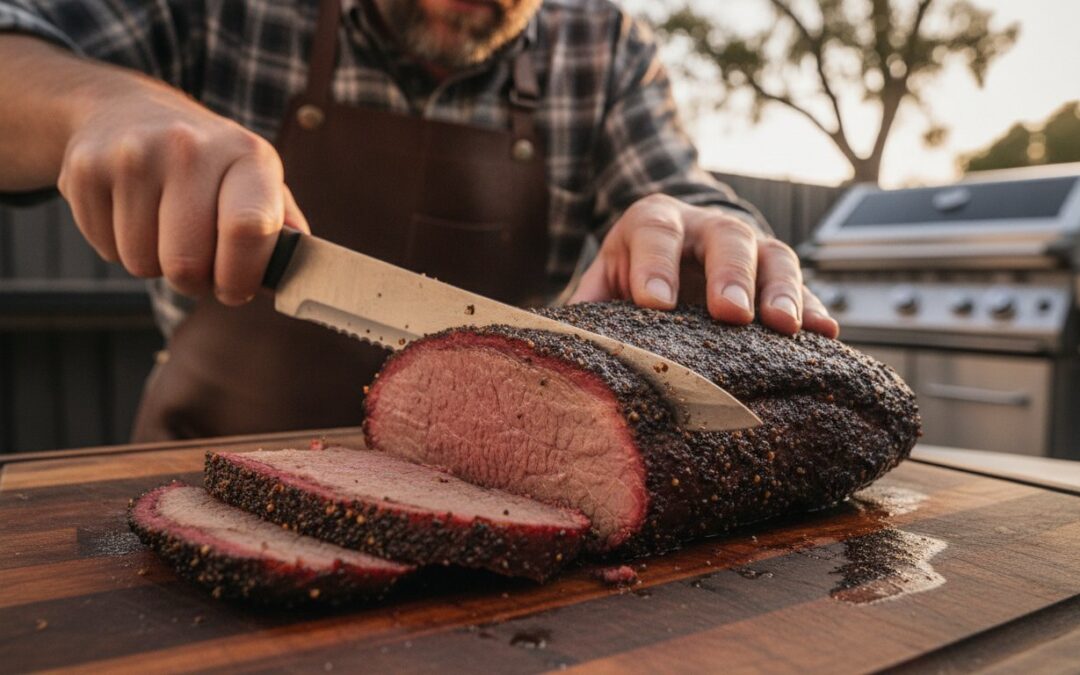
Slicing against the grain is the final mechanical secret to a tender bite. The brisket is composed of two muscles with grain directions that run nearly perpendicular to each other. You must rotate the meat as you move from the flat to the point to ensure you are always cutting across the fibers. If you slice with the grain, the meat will be stringy and tough regardless of how well it was cooked. Standard practice is to slice to the width of a pencil. Using a sharp, serrated brisket knife is a vital BBQ accessory for this task. A dull blade will tear the bark and squeeze out the remaining moisture.
If you face a dry result, use a last-resort rescue. Chop the meat and incorporate rendered beef tallow or a thin, flavorful au jus. This reintroduces the fatty mouthfeel that the rendering process failed to provide. It won’t win a competition, but it saves the meal. You must understand why did my brisket turn out dry to adjust your technique for the next cook. Barbecue is a craft of constant refinement. Master the rest, and you master the brisket.
Master the Craft of the Perfect Brisket
Achieving a competition-grade result requires precision from the first trim to the final slice. You now understand that the question why did my brisket turn out dry often points to improper rendering or a rushed rest period. Success depends on selecting high-grade meat and protecting it through the stall with professional wrapping techniques. Most importantly, you must maintain a clean, stable fire to preserve every drop of internal moisture.
Fuel your next cook with Charcoal Kings Premium Hardwood Lump. Our fuel is the choice of professional Australian pitmasters because it delivers high-heat, long-burn performance for 12+ hour cooks. It’s 100% Natural Hardwood with no chemical additives, ensuring your bark remains pure and flavorful. Don’t let a single dry cook discourage you. Apply these professional standards to your next session and watch your results transform. Get your fire right, trust the process, and enjoy the reward of a truly moist brisket.
Frequently Asked Questions
Can I fix a brisket that is already dry?
You can save dry brisket by reintroducing fat or liquid during the serving stage. Chop the meat and toss it with rendered beef tallow or a thin, beef-based au jus. This technique masks the dry texture and provides the fatty mouthfeel that was missing. It is a common professional fix for briskets used in sandwiches or tacos where sauces can further compensate for moisture loss.
What is the best temperature to cook brisket at to keep it moist?
Maintaining a steady cook chamber temperature between 225°F and 250°F is the gold standard. This range allows for the slow conversion of collagen into gelatin without evaporating internal water too quickly. High temperatures often cause the muscle fibers to contract violently. This is a primary reason why did my brisket turn out dry; the heat simply forces the moisture out before the fat can render.
Should I fat-side up or fat-side down for a juicier result?
Position the fat cap toward your heat source to act as a thermal shield. In most offset smokers, this means fat-side up to protect the meat from convective heat. In cookers where the heat comes from directly below, fat-side down is better. This strategy prevents the lean muscle fibers from being scorched or dried out during the long hours on the grill.
Does spritzing my brisket actually keep it from drying out?
Spritzing cools the surface of the meat and slows down the cooking process, but it doesn’t add internal moisture. It helps build a better bark by keeping the exterior pliable and attracting smoke particles. You should spritz only when the surface looks dry. Over-spritzing can extend the cook time significantly, which may eventually lead to a drier internal result due to prolonged heat exposure.
Why is my brisket flat always drier than the point?
The flat is a lean muscle with significantly less intramuscular fat than the point. It has a higher surface-area-to-volume ratio, which leads to faster evaporation. Because the flat is thinner, it often reaches the finish line before the point is ready. You must protect the flat by wrapping it or positioning it further from the heat source to prevent it from becoming parched.
How much charcoal will I need for a full brisket cook?
A standard 12-hour cook typically requires between 8 and 12 kilograms of premium hardwood lump charcoal. This amount depends on your smoker’s insulation and the ambient temperature. Always maintain a deep coal bed to ensure consistent heat. Having a reserve supply is essential so you don’t lose temperature momentum, which can cause the meat to contract and lose its internal juices.
Is it better to use lump charcoal or briquettes for brisket?
Premium hardwood lump charcoal is the superior choice for long brisket cooks. It burns cleaner and produces less ash than standard briquettes. Because it contains no chemical additives, your meat retains its natural beef flavor. Precise airflow control with lump charcoal helps you avoid the temperature spikes that explain why did my brisket turn out dry. It is the reliable fuel for a 12-hour session.
What happens if I don’t rest my brisket?
Slicing a brisket without resting causes the internal juices to evaporate instantly as steam. This leaves the muscle fibers parched and the meat grey. A proper rest of at least two to four hours allows the internal pressure to stabilize and the rendered gelatin to set. This ensures the moisture remains inside the meat, providing the melt-in-your-mouth texture that defines professional barbecue.