A jet-black, crunchy brisket bark isn’t the result of luck or a mysterious spice blend. It’s a thermodynamic achievement driven by clean-burning fuel and precise airflow management. Most pitmasters have faced the frustration of a soggy, grey exterior or a bitter, creosote-tainted crust after a twelve-hour cook. It’s a common hurdle that separates the casual backyard griller from the seasoned Australian pitmaster who understands the chemistry of the pit.
You’re about to unlock the professional techniques and fuel secrets to a perfect brisket bark that delivers an iconic mahogany hue and a deep smoke ring every single time. We’ll show you how to avoid the stall pitfalls and ensure your rub adheres properly for maximum crunch and flavour. This guide covers the science of the Maillard reaction, the necessity of high-density hardwood lump charcoal, and the exact timing required to set your bark before you even think about reaching for the butcher paper. Get ready to transform your low-and-slow game from inconsistent to competition-grade performance.
Key Takeaways
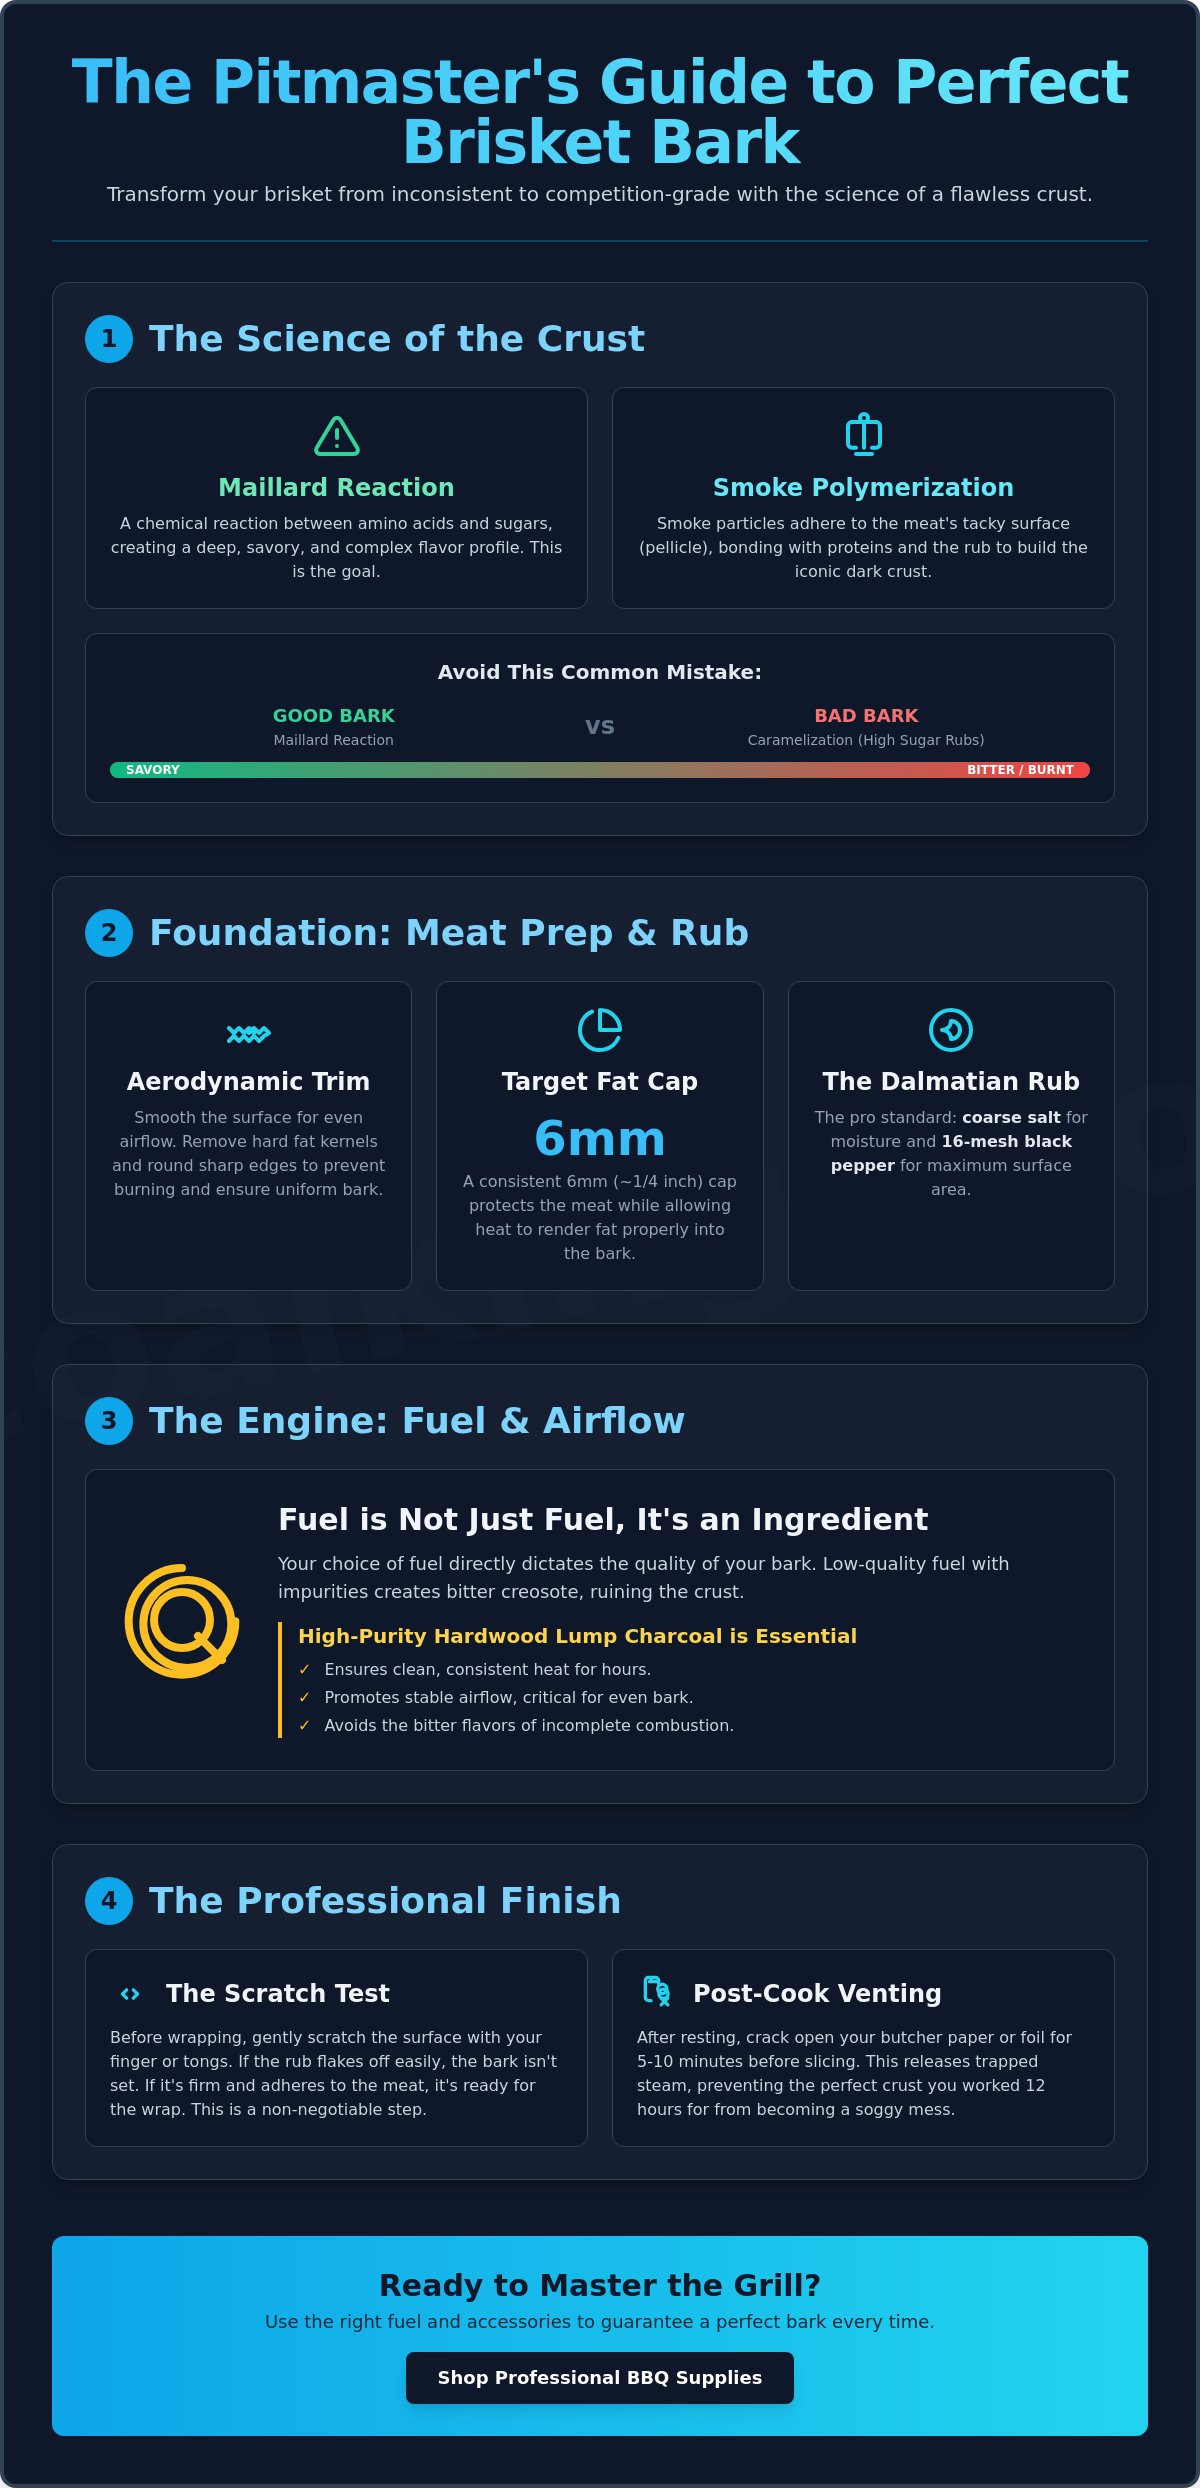
- Master the science of the Maillard reaction and smoke polymerisation to build a dark, professional-grade crust.
- Execute an Aerodynamic Trim and use 16-mesh black pepper to unlock the secrets to a perfect brisket bark.
- Utilise high-purity Hardwood Lump Charcoal to ensure the consistent airflow and clean heat required for superior bark development.
- Apply the Scratch Test and professional venting techniques to prevent soggy bark and maintain maximum crunch during the resting phase.
What is Brisket Bark? The Science Behind the Crust
Brisket bark is the hallmark of a master pitmaster. It is a complex, multi-layered crust formed by the Maillard reaction and smoke polymerisation. This exterior is more than just a dark surface; it is a concentrated flavour bomb that defines the success of your cook. To understand the secrets to a perfect brisket bark, you must first understand the anatomy of the brisket cut. This tough, connective tissue-rich muscle requires long exposure to heat and smoke to transform into a tender masterpiece.
As the meat cooks, moisture evaporates from the surface. This drying process creates a thin, tacky skin known as the pellicle. Smoke particles, including both vapours and solids, adhere to this surface throughout the cook. Over several hours, these particles bond with the meat proteins and the rub to create a dark, mahogany-to-black exterior. This layer captures the essence of your fuel and seasoning, providing the essential crunch that balances the rendered fat of the internal meat.
To better understand this concept, watch this helpful video:
The Maillard Reaction vs. Caramelisation
Many beginners confuse bark with caramelisation. Caramelisation is the oxidation of sugar. It occurs at high temperatures and can lead to a bitter, burnt taste if mismanaged. In contrast, the Maillard reaction is a chemical reaction between amino acids and reducing sugars. This process creates the rich, savoury notes we associate with high-quality grilled meat. One of the secrets to a perfect brisket bark is avoiding rubs with excessive sugar content. Sugar burns quickly. A long cook with high-sugar rubs often results in a bitter, scorched mess rather than a proper bark. The reaction thrives at temperatures above 100°C, once the surface moisture has sufficiently evaporated.
Hygroscopy and the Role of Salt
Salt is the primary driver of bark formation through a process called hygroscopy. When you apply salt to raw meat, it draws moisture to the surface. This creates a concentrated brine. While it might seem counterintuitive, a bone-dry surface is the enemy of early-stage bark. Smoke particles need a tacky, moist surface to stick. If the surface is too dry, smoke simply bounces off. Salt keeps the surface just wet enough to capture smoke vapours before they polymerise into a hard crust. This tacky layer ensures the rub stays in place and the smoke penetration remains consistent throughout the cook.
Foundation for Success: Meat Prep and Rub Secrets
A flawless bark begins long before you light the pit. It starts with a knife. One of the primary secrets to a perfect brisket bark is the Aerodynamic Trim. You must remove all hard kernels of fat and smooth out jagged edges. These irregularities cause air turbulence inside the smoker. Turbulent air leads to uneven heat distribution and patchy bark development. By creating a smooth, streamlined surface, you allow the smoke to flow across the meat consistently, depositing particles in a uniform layer. Rounding the edges of the flat is also vital. Sharp corners dry out too fast and turn into rock-hard burnt ends that are inedible rather than delicious.
Trimming for Airflow and Convection
Identify and remove any divots or fat pools on the surface of the brisket. If liquid fat collects in these depressions during the cook, it will wash your rub away. This prevents the pellicle from forming and leaves you with a grey, soggy patch. Cold meat absorbs smoke more efficiently than room temperature meat because smoke particles adhere better to cool, moist surfaces. Aim for a consistent fat cap thickness of roughly six millimetres. This provides enough protection to keep the meat moist while allowing the heat to penetrate and render the fat into the bark. Using professional BBQ accessories like a sharp boning knife ensures your trim is precise and your surface is ready for seasoning.
The Chemistry of the Rub
The industry standard is the Dalmatian Rub, consisting of coarse salt and 16-mesh black pepper. This specific grind of pepper is critical. It provides the necessary surface area and physical structure for smoke to cling to. Coarse particles create a rugged landscape on the meat surface, increasing the total area available for the chemical interactions between smoke vapours and proteins. While some pitmasters use mustard as a binder, it is largely flavour neutral once cooked. Water or even the meat’s own natural moisture often produces a cleaner, more authentic bark. Do not cake the rub. Excessively thick layers of rub will eventually flake off, taking your hard-earned bark with it. Apply the rub evenly until the meat is still slightly visible through the seasoning. This ensures every centimetre is covered but not buried. Mastering this balance is one of the essential secrets to a perfect brisket bark that holds its integrity from the pit to the cutting board.
The Role of Fuel: Why Charcoal Quality Dictates Bark
Your fuel choice is the most overlooked variable in bark development. Many beginners assume any heat source will suffice, but chemical-laden briquettes are a primary cause of bitter, acrid crusts. One of the technical secrets to a perfect brisket bark is the use of high-purity hardwood lump charcoal. Unlike mass-produced briquettes that rely on starch binders and coal fillers, pure hardwood lump burns clean. This ensures you achieve the elusive “blue smoke”—a transparent, shimmering vapour that deposits flavour without the soot. Billowing white or grey smoke is a sign of incomplete combustion. This “dirty smoke” coats your meat in creosote, resulting in a bitter flavour and a dull, greyish appearance rather than a vibrant mahogany bark.
Australian pitmasters have a distinct advantage with local timbers. Species like Ironbark and Red Gum are incredibly dense. They provide the sustained, intense heat required to push through the stall while contributing deep, earthy tones to the bark’s colour. Understanding The Science of BBQ reveals that the chemical components of the smoke actually bond with the meat’s surface proteins. High-quality fuel ensures these bonds form correctly without interference from synthetic additives. Purity isn’t just a marketing term; it’s a performance requirement for a world-class crust.
Hardwood Lump vs. Briquettes for Long Smokes
Briquettes produce significant amounts of ash. In a twelve-hour brisket cook, this ash buildup can smother your firebox, restricting airflow and causing temperature fluctuations. Lump charcoal maintains a higher energy density and leaves minimal residue. This stability is crucial during the “stall,” where consistent heat is needed to evaporate surface moisture and set the crust. Using pure fuel prevents the acridity often found in low-grade cooks. It’s about performance and purity. If your fuel is dirty, your bark will be too.
Managing the Fire for Maximum Convection
Airflow acts like a convection oven. Inside your smoker, moving air bakes the rub onto the meat surface. If your fire is sluggish or starved of oxygen, the bark will remain soft and tacky. You need a “hot and clean” fire to facilitate the Maillard reaction properly. For those just starting, Mastering the Art of Barbecuing with Charcoal is essential reading for understanding vent control. Effective airflow management ensures the exterior dries at the correct rate, locking in the secrets to a perfect brisket bark through superior heat transfer and consistent combustion.
Managing the Cook: Spritzing, Airflow, and the Wrap
The “Texas Crutch” is often misunderstood by novice pitmasters. While most guides suggest wrapping when the internal temperature hits 71°C, this is one of the biggest mistakes you can make. Temperature is merely a guide; visual and tactile feedback are the real secrets to a perfect brisket bark. Bark development is not a linear process. It depends on humidity, airflow, and the specific fat content of your brisket. If you wrap based purely on a thermometer reading, you risk steaming a bark that hasn’t fully set, resulting in a soft, unappealing texture.
Perform the “Scratch Test” before you reach for the wrap. Gently run your finger or a fingernail across the surface of the meat. If the rub stays firmly in place and feels like a crust, the bark is set. If it wipes off or feels like a wet paste, it needs more time in the smoke. Patience during this phase is what separates a professional crust from a backyard failure. Wrapping too early is the number one cause of soggy bark. Trust your eyes and your touch over your digital probes.
The Spritzing Strategy
Spritzing serves a dual purpose. It prevents the thin edges of the flat from burning and aids in smoke absorption through a process called thermalophoresis. Cool moisture on the surface creates a temperature gradient that physically pulls smoke particles toward the meat. Use a mixture of apple cider vinegar and water, but wait until at least the three-hour mark. Spritzing too early will wash away your seasoning before it has a chance to bond with the proteins. Target dry spots only. Avoid spritzing the fat cap, as you want that fat to render and crisp up, not remain damp.
To Wrap or Not to Wrap?
The “Naked Brisket” method provides the most intense bark, but it risks drying out the meat during long Australian summer cooks. Butcher paper is the professional compromise. It is breathable. It allows excess steam to escape while protecting the meat from becoming overly smoky or dry. Aluminium foil creates a mini-sauna that will soften your bark into mush. For the ultimate result, try the “Foil Boat” method. Wrap only the bottom and sides of the brisket in foil, leaving the top bark exposed. This protects the meat in its own rendered fat while allowing the crust to continue hardening in the airflow. Ensuring you have the right BBQ accessories like high-quality butcher paper is essential for this stage.
Don’t panic when you hit “The Stall.” This is simply evaporative cooling where the meat is sweating off moisture. Cranking the heat too high during this phase can ruin the texture of the fat and scorch the rub. Maintain your target pit temperature and let the thermodynamics work. Consistency is one of the final secrets to a perfect brisket bark. Keep the lid closed, keep the airflow steady, and wait for that bark to achieve its final, jet-black glory.
The Professional Finish: Resting and Slicing
The cook doesn’t end when the meat hits your target internal temperature. A long rest is non-negotiable for bark stability. You need two to four hours of downtime to allow the muscle fibres to relax and the rendered fat to set. One of the final secrets to a perfect brisket bark is the venting process. If you pull a brisket from the pit and place it directly into an insulated cooler while it’s still steaming, you are essentially pressure-cooking the crust you spent twelve hours building. This trapped moisture turns a crunchy exterior into a soggy, grey mess within minutes.
Execute a proper vent by opening the butcher paper or foil for ten to fifteen minutes once the meat is off the heat. Let the internal temperature drop slightly and allow the visible steam to escape. Once the bark feels firm and the steam has dissipated, re-wrap the meat tightly for the remainder of the rest. This pause stops carry-over cooking and ensures the bark stays anchored to the meat. Achieving this level of quality requires the right foundation. Charcoal Kings provides the high-purity Hardwood Lump Charcoal and professional-grade rubs necessary to produce competition-level results in your own backyard.
The ‘Active’ Rest vs. The ‘Passive’ Rest
Professional pitmasters often prefer an active rest. Set your oven to its lowest setting, ideally 65°C, and hold the brisket there for several hours. This temperature is high enough to remain food-safe but low enough to prevent further cooking. During this time, the fats on the surface re-absorb into the crust, creating a deep, mahogany gloss. Never slice a brisket immediately after it leaves the smoker; the internal pressure will force the juices out, leaving the meat dry and the bark limp.
Troubleshooting Common Bark Failures
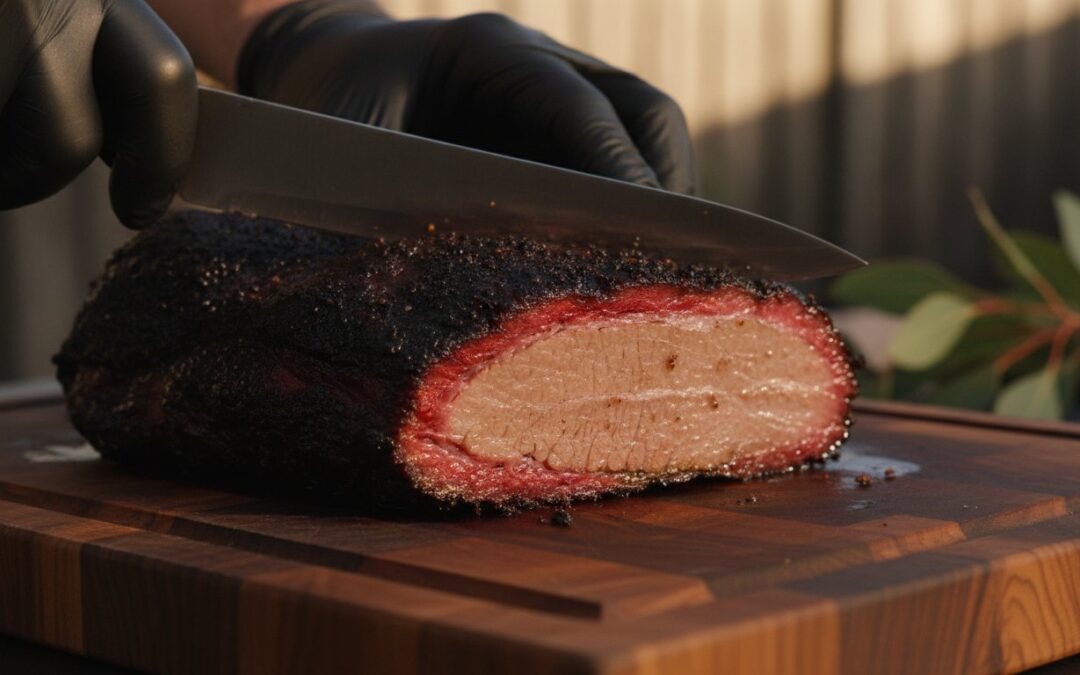
Even seasoned pitmasters encounter issues. If your bark is mushy, you likely wrapped too early or failed to vent the steam before resting. You can sometimes rescue a soft bark by placing the brisket back on the pit, unwrapped, for twenty minutes at 110°C to firm it up. Bitter bark is almost always a result of poor fuel quality or a dirty fire. If you see grey soot on your meat, your charcoal contained additives or you lacked sufficient airflow. For a bark that feels too dry or brittle, brush a light layer of warm beef tallow over the surface before slicing. This restores the sheen and adds a layer of rich flavour without ruining the crunch. Slicing against the grain for the “money shot” is the final step. Use a long, serrated slicing knife and let the weight of the blade do the work to prevent the bark from crumbling off the meat.
Master Your Next Low-and-Slow Cook
Legendary crust is the result of discipline and high-performance materials. You now have the technical roadmap to avoid soggy bark and bitter flavours. By combining the Aerodynamic Trim with a clean-burning fire, you ensure the Maillard reaction and smoke polymerisation work in your favour. These professional secrets to a perfect brisket bark transform a standard cook into a competition-grade masterpiece that delivers on texture and taste.
Charcoal Kings supplies Australia’s top competition BBQ teams with the highest quality fuel on the market. Our 100% Natural Hardwood contains zero chemical additives, providing the consistent heat and clean blue smoke required for a superior finish. Visit our Holden Hill location to get expert advice from local BBQ masters who understand the specific demands of the Australian pit. We provide the tools and the knowledge to ensure your next brisket is your best one yet.
Fuel your next masterpiece with premium Hardwood Lump Charcoal from Charcoal Kings. It’s time to light the fire and achieve the perfect crunch.
Frequently Asked Questions
Why is my brisket bark not turning black?
A pale bark is usually caused by insufficient airflow or excessive humidity inside the pit. If the meat surface remains too wet, the Maillard reaction cannot trigger properly. You must maintain a clean fire with high-quality hardwood lump charcoal to ensure temperatures stay consistent. A lack of coarse black pepper in your rub also limits the surface area available for smoke particles to attach and darken.
Can I get good bark on a pellet grill compared to charcoal?
You can achieve a solid bark on a pellet grill, but it requires more management than a charcoal smoker. Pellet grills produce a thinner, lighter smoke that takes longer to build a deep crust. To compensate, many pitmasters cook at a lower temperature for the first three hours to increase smoke exposure. Using a heavy pepper-based rub is one of the secrets to a perfect brisket bark when working with the lighter smoke profile of pellets.
Does sugar in the rub help or hurt the bark?
Sugar generally hurts the quality of a brisket bark during long cooks. Brisket requires twelve or more hours of heat, and sugar begins to scorch and turn bitter long before the meat is finished. This results in a burnt, acrid taste rather than a savoury crust. Stick to a traditional salt and pepper rub for the best results. Save the sugars for shorter cooks like pork ribs or as a final glaze.
Is it possible to have too much bark on a brisket?
You can have too much bark if the exterior becomes excessively hard or “jerky-like.” This happens when the meat is exposed to high airflow for too long without any spritzing to manage surface evaporation. A perfect bark should be dark and crunchy but still yield easily to a knife. If the crust is so hard it shatters or becomes difficult to chew, you have over-dried the exterior of the muscle.
How do I keep the bark from sticking to the butcher paper?
The bark will stick to the paper if it hasn’t fully set before you wrap. Always perform the scratch test to ensure the rub is anchored to the meat proteins. If the surface is still tacky, the paper will bond to the moisture. Many professionals apply a thin layer of rendered beef tallow to the butcher paper before wrapping. This acts as a natural release agent and keeps the bark glossy and intact.
What is the best wood for a dark brisket bark in Australia?
Ironbark and Gidgee are the superior choices for Australian pitmasters seeking a dark bark. These hardwoods are exceptionally dense and provide a clean, intense heat that facilitates the Maillard reaction. They produce a robust smoke profile that contributes to a deep mahogany or jet-black finish. Avoid using “green” or unseasoned wood, as the resulting dirty smoke will leave a bitter, grey soot on the meat instead of a clean crust.
Why does my bark fall off when I slice the brisket?
Bark typically falls off because it failed to bond with the meat during the early stages of the cook. This often happens if there is too much unrendered fat left on the surface or if the meat was too dry when the rub was applied. One of the secrets to a perfect brisket bark is ensuring a thin, even fat trim so the rub can anchor directly to the meat fibres. A proper two-hour rest also allows the bark to stabilise before slicing.
Should I put the fat side up or down for better bark?
Position the fat side according to where the heat enters your cooking chamber. In an offset smoker, the heat comes from above, so fat side up protects the meat and allows the rendering fat to season the bark. In a drum or cabinet smoker where heat comes from below, the fat side should face down to act as a shield. For the most consistent bark, always ensure the presentation side of the meat has maximum exposure to the airflow.