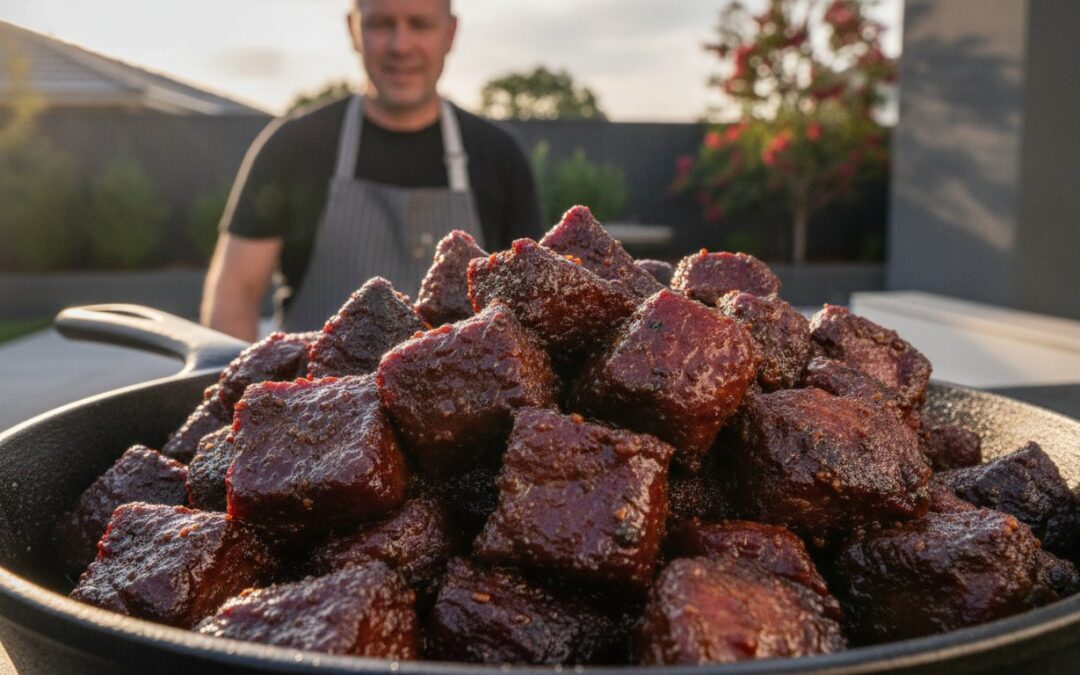
The best part of a brisket isn’t the uniform slices; it’s the cubes of “meat candy” most people treat as an afterthought. You’ve likely spent half a day tending a fire only to end up with dry, chewy cubes or bark that turns to mush during the braise. It’s a waste of high-quality beef when the point doesn’t reach its full potential. Mastering the process of making burnt ends from brisket point requires more than just a bottle of sauce. It demands absolute control over your fuel and an understanding of how heavy fat renders under the clean, intense heat of premium hardwood lump charcoal.
This guide will teach you how to transform the brisket point into consistent, competition-quality burnt ends. We’ll outline the exact timing for separating the point and how to set a resilient bark before the meat ever touches a foil pan. You’ll learn the professional braising techniques that ensure a tender finish without losing the structural integrity of the meat. By the end, you’ll have the technical knowledge to manage your fire and your cook with the authority of a seasoned pitmaster.
Key Takeaways
- Identify why the high intramuscular fat of the brisket point is essential for achieving the signature “meat candy” texture.
- Apply professional trimming techniques to remove hard fat and improve aerodynamics for more even cooking.
- Master making burnt ends from brisket point by using premium Hardwood Lump Charcoal to ensure a clean smoke profile.
- Execute a precise two-stage cook that balances long-duration smoking with a controlled braising phase.
- Troubleshoot common issues like mushy bark by selecting the correct meat grade and managing braising liquids effectively.
What Are Brisket Burnt Ends and Why Use the Point?
Burnt ends were once the discarded scraps of the barbecue world, trimmed away and handed out as samples or thrown into beans. Today, they represent the pinnacle of the craft. To understand What Are Brisket Burnt Ends, you have to look at the specific anatomy of the beef. They are the cubed, re-sauced, and double-smoked portions of the brisket point. While the rest of the brisket is sliced, the point is reserved for this specialized treatment because it can withstand the intense heat required to caramelize sugars and render heavy fat into something truly exceptional.
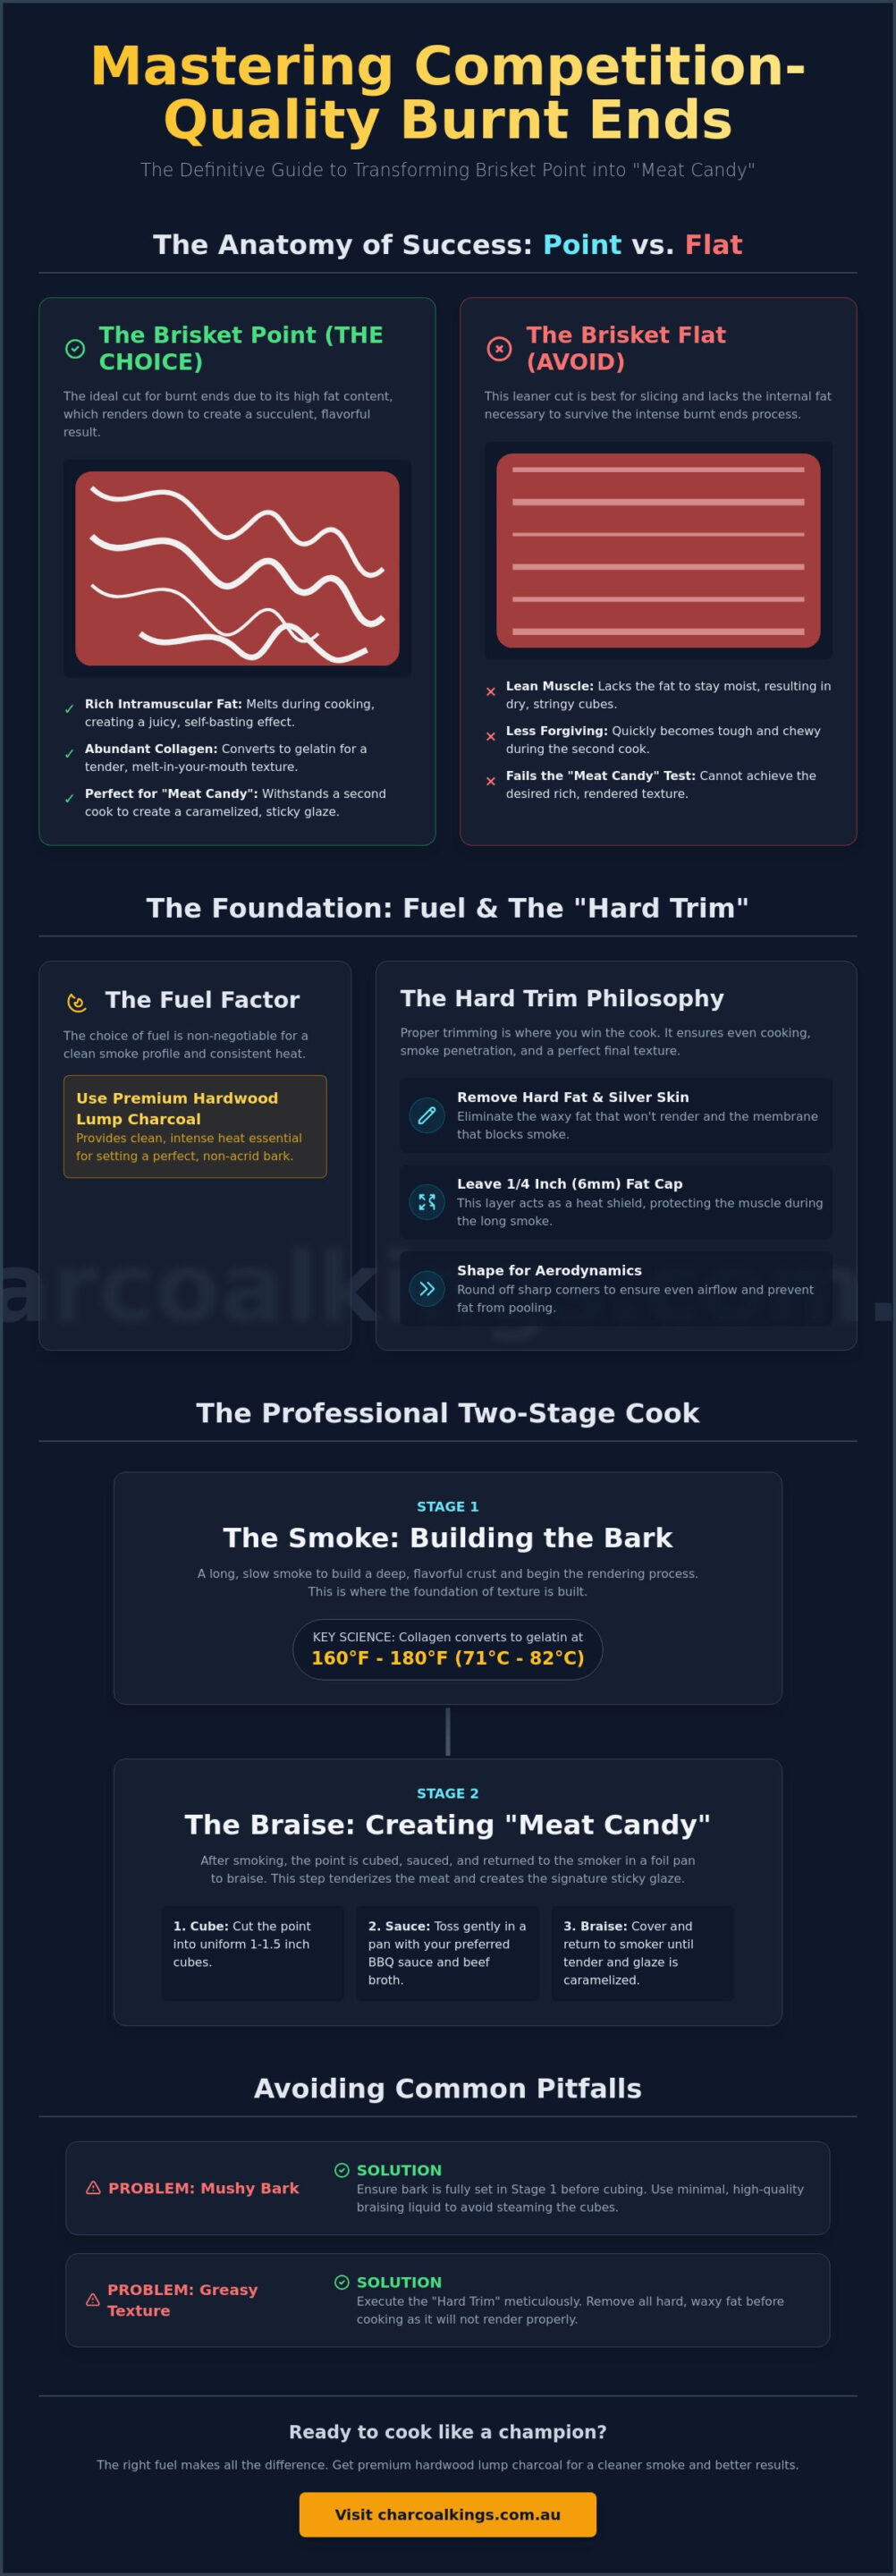
The “Meat Candy” standard isn’t achieved by accident. It requires a perfect balance of three elements: a crunchy, smoky bark, fully rendered intramuscular fat, and a sticky, savory glaze. Making burnt ends from brisket point is the only way to reach this standard. If you try this with the brisket flat, you’ll fail. The flat is too lean; it lacks the internal lubrication to survive a second trip to the smoker. By the time the sauce caramelizes, a cube of flat meat will be dry, stringy, and tough. The point, however, thrives under these conditions.
To better understand the physical differences and the preparation required, watch this professional breakdown:
The Science of the Brisket Point
The brisket point is a powerhouse of connective tissue and marbling. Success depends on the conversion of collagen into gelatin. This transformation happens slowly between 160°F and 180°F. Without this chemical change, the meat remains rubbery. The point features both a thick external fat cap and significant intramuscular fat, known as marbling. The external fat protects the muscle during the initial smoke, while the internal marbling melts to baste the fibers from the inside out. The deckle is the fatty interface between the point and flat that provides essential moisture during the long render.
Why Point-Only Cooks Are Trending
Dedicated point-only cooks are gaining popularity because they offer superior efficiency. Buying just the point from a butcher allows you to focus your fuel and time on a single muscle with uniform cooking requirements. When making burnt ends from brisket point alone, you increase the total surface area available for bark development. Every side of the cube eventually becomes coated in seasoning and smoke. You also avoid the 12 to 16 hour commitment of a full packer brisket. A point-only session is faster, more predictable, and ensures every bite meets the high standards of professional competition barbecue.
Preparing the Point: Trimming and Seasoning for Maximum Bark
Preparation is where you win or lose the cook. The Hard Trim philosophy is non-negotiable when making burnt ends from brisket point. Hard fat, specifically the dense white fat that feels like wax, will never render regardless of how long you smoke it. It acts as a physical barrier. It prevents smoke from reaching the meat and seasoning from bonding with the muscle. If you leave it on, you’ll end up with a greasy mouthful rather than the desired “meat candy” texture. Removing this fat allows the smoke to penetrate deeply and the rub to form a resilient, crunchy crust.
Aerodynamics are equally critical, especially in offset smokers. You must shape the point into a streamlined, rounded piece of meat. Sharp corners or uneven ridges cause “puddling” where rendered fat collects on the surface. This liquid washes away your rub before the bark can set. A smooth, aerodynamic profile ensures consistent airflow and even heat distribution across every square inch. For those seeking a complete guide to making brisket burnt ends, understanding these physical properties is the first step toward professional results.
Trimming the Deckle and Fat Cap
Start by removing all silver skin from the top of the point. This membrane is impenetrable to smoke. Turn your attention to the fat cap. Aim to leave exactly 6mm (1/4 inch) of fat across the surface. This layer serves as a heat shield, protecting the delicate muscle from the direct heat of your smoker. Locate the large kernel of hard fat near the deckle. Dig this out entirely with a sharp boning knife. In the Australian climate, high humidity can sometimes affect how fat renders, so a clean trim is your best defense against a soggy bark.
Seasoning for the Long Haul
The high fat content of the point requires a bold seasoning strategy. A standard Dalmatian Rub consisting of coarse salt and 16-mesh black pepper is the industry standard. The pepper provides the texture needed for smoke particles to cling to. The salt penetrates deep into the muscle. Applying a dry brine at least four hours before the cook, ideally overnight, improves the final texture and deepens the smoke ring. You’ll need a binder to ensure total adhesion. Common choices include:
- Yellow Mustard: Adds zero flavor but provides excellent tackiness.
- Cooking Oil: Helps fat-soluble compounds in the rub penetrate the meat.
- Water: The purest option for those who want no interference with the beef’s natural profile.
Proper seasoning is only half the battle; you must also understand the mechanics of your heat source. Check out our guide on Mastering the Art of Barbecuing with Charcoal to learn how to manage your fire for long-duration cooks. Using the right Hardwood Lump Charcoal ensures your bark stays clean and free from bitter soot residues.
The Fuel Factor: Choosing the Best Charcoal for Brisket
Fuel is the most overlooked ingredient in the pitmaster’s arsenal. When making burnt ends from brisket point, your fuel source must provide stable, clean heat for 12 to 18 hours. Hardwood Lump Charcoal is the superior choice for these extended sessions. It offers a higher carbon content than standard alternatives, which translates to a more efficient burn and significantly less ash production. This efficiency is vital for maintaining a consistent temperature between 107°C and 121°C. If your fuel produces excessive ash, it will eventually clog your air intakes, leading to temperature fluctuations that can stall your cook indefinitely.
The Clean Smoke rule is non-negotiable for fatty cuts. The brisket point is rich in intramuscular fat, which acts as a sponge for flavor. Poor quality fuel or wood that hasn’t reached its combustion point produces creosote. This thick, acrid smoke creates a bitter, metallic film on the meat that no amount of sauce can hide. Using premium, additive-free charcoal ensures that the smoke remains “blue” and translucent. For the best results, pair your charcoal base with heavy smoking woods like Ironbark or Oak. These varieties provide a robust, traditional flavor profile that stands up to the intense beefiness of the point.
Hardwood Lump vs. Briquettes for Brisket
Consistency is the primary goal for long-duration smokes. Premium hardwood lump charcoal is the professional standard because it contains zero chemical binders or fillers. This purity ensures a clean flavor profile from start to finish. While briquettes offer a uniform shape, they often produce more ash, which can insulate the fire and cause the temperature to drop during the critical final hours of the render. For a detailed breakdown of fuel performance, consult The Ultimate Guide to BBQ Charcoal.
Fire Management in Australian Conditions
Operating a smoker in high-ambient temperatures, such as a 35°C day in South Australia, requires precise airflow control. Your smoker will naturally run hotter, so you must restrict the intakes more than you would in cooler climates. For making burnt ends from brisket point overnight, use the minion method or the snake method. These techniques involve lighting a small portion of your charcoal and allowing it to ignite the rest of the fuel gradually. This provides a controlled, slow burn that maintains steady heat while you sleep. If you want a high-heat finish to crisp up the edges of your cubes after the braise, adding a few pieces of Binchotan Charcoal provides an intense, flameless heat that creates a superior crust.
The Two-Stage Cook: From Smoke to Braise
Making burnt ends from brisket point requires a disciplined approach to the two-stage cook. Stage one focuses on the foundation: the bark and the internal render. You must smoke the point whole until the bark is fully set. A reliable test for this is the scratch test. If you can’t move the bark with your fingernail, it’s ready. This usually happens after the meat conquers the stall, typically around 74°C to 79°C. During this phase, the choice of wrap is critical. Butcher paper allows the meat to breathe and preserves the crunch of the bark. Foil, however, creates a pressurized environment that accelerates the breakdown of tough connective tissues. For dedicated burnt ends, foil is often preferred to jumpstart the softening process before cubing.
The transition to stage two begins when the internal temperature reaches approximately 88°C. The meat is not yet fully tender, but it’s structurally sound enough to be sliced into uniform cubes. Pull the point from the smoker and let it rest for 15 minutes to allow the juices to stabilize. Cube the meat into 2.5cm (1-inch) pieces. This specific size is the gold standard in competition barbecue. It provides enough surface area for the glaze to adhere to while retaining a moist, tender center. Smaller cubes risk drying out during the final braise, while larger cubes may not render fully in the center.
The Cubing and Saucing Framework
Once cubed, place the meat into a heavy-duty foil pan. The braising liquid is what transforms the beef into “meat candy.” Avoid drowning the meat; you want a coating, not a soup. Use this professional ratio for a standard 2kg point:
- 1 cup of high-quality BBQ sauce (low in corn syrup to prevent burning).
- 1/4 cup of honey or dark brown sugar for deep caramelization.
- 2 tablespoons of beef tallow or unsalted butter to maintain richness.
Mix the cubes thoroughly to ensure every side is coated. Cover the pan tightly with foil for the first 45 minutes of the second stage. This steams the cubes in the sauce. For the final 20 to 30 minutes, remove the foil. This allows the sugars to tack up and the sauce to set into a sticky, translucent glaze. To achieve this level of precision, you should invest in a professional BBQ smoker and accessories that allow for steady, predictable heat management.
Knowing When It is Done: The Probe Test
Internal temperature is merely a guide during the final stage. While 95°C (203°F) is the typical target, the probe test is the only definitive measure of success. Take a temperature probe or a wooden skewer and insert it into several different cubes. It should feel like sliding a hot needle through room-temperature butter. If there’s any resistance or a “grabby” feel, the collagen hasn’t fully converted to gelatin. However, you must be careful not to over-braise. If the cubes begin to lose their shape or crumble when touched, they’ve gone too far. You want distinct cubes that hold their form but melt the moment they’re eaten.
Avoiding Common Pitfalls: Troubleshooting Your Burnt Ends
Even with the right equipment, making burnt ends from brisket point can result in a few common failures if you lose focus during the final stages. A mushy or soft bark is the most frequent complaint. This is almost always caused by an excessive amount of braising liquid in the foil pan. If your bark loses its crunch, reduce the volume of sauce and tallow in your next cook. Ensure you finish the cubes uncovered for at least 30 minutes. This allows the heat to evaporate excess moisture and tacks up the glaze into a resilient coating.
Bitterness is another deal-breaker. If the meat tastes acrid or metallic, your fire management was likely the culprit. This happens when the wood or charcoal smoulders rather than burns cleanly. To prevent this, always ensure your fuel has reached a state of clean combustion before the meat enters the chamber. Switching to a higher purity Hardwood Lump Charcoal eliminates the risk of chemical fillers or additives tainting the heavy fat of the point. If the cubes are dry despite a heavy braise, the issue usually lies with the meat grade. You cannot fix a lack of internal marbling with external sauce.
Meat Selection: The Secret Ingredient
Success starts at the butcher’s counter. For this specific application, grain-fed beef consistently outperforms grass-fed varieties. Grain-fed cattle typically produce the dense, reliable intramuscular fat required to survive a double-smoke session. When selecting your point, aim for a minimum of MB3+ or USDA Prime. Look for white, intricate marbling throughout the muscle rather than large, isolated chunks of fat. Using a water pan in the smoker is recommended to maintain a high-humidity environment, which prevents the surface of the cubes from case hardening before the internal fat has rendered.
The Final Rest and Reheating
Do not serve the cubes immediately after pulling them from the heat. A 15 to 20 minute mini-rest is essential. This allows the internal temperature to stabilize and the sticky glaze to set firmly onto the bark. For a traditional presentation, serve these rich morsels with plain white bread, sour pickles, and sliced raw onions. These acidic elements are necessary to cut through the intense richness of the rendered beef fat.
If you have leftovers, store them in a vacuum-sealed bag to prevent oxidation. Reheat them gently in a water bath or a low oven at 120°C with a small splash of beef stock to restore the moisture. Ready to start your cook? Shop Charcoal Kings Premium Hardwood Lump Charcoal to ensure your next session delivers the clean, professional results your brisket deserves.
Master Your Next Pitmaster Session
You now have the technical foundation for making burnt ends from brisket point that rival any professional smokehouse. Success depends on the disciplined transition from the initial smoke to the braising pan and the relentless pursuit of a clean fire. By focusing on a precise aerodynamic trim and selecting high-grade grain-fed beef, you ensure every cube renders into the signature “meat candy” texture. Avoid the common error of over-saucing; let the quality of the beef and the depth of the bark speak for themselves.
Superior results require superior fuel. As an Australian-owned and operated specialist, we provide the chemical-free, high-performance charcoal necessary for these demanding long-duration cooks. Our products are trusted by professional pitmasters across South Australia for their consistent heat and absolute purity. There’s no room for chemical additives when you’re aiming for barbecue perfection. It’s time to stop settling for average results and start dominating the grill.
Fuel your next brisket cook with Charcoal Kings Hardwood Lump Charcoal
Fire up your smoker and put these professional techniques to the test. The path to competition-quality barbecue starts with total control over your pit and the fuel you burn.
Frequently Asked Questions
Can I make burnt ends from the brisket flat?
You cannot make traditional burnt ends from the brisket flat because it lacks the necessary intramuscular fat. The flat is a lean muscle that dries out quickly when cubed and subjected to a second cook. True burnt ends require the high fat content found in the point to remain moist during the long caramelization process. If you attempt this with the flat, you’ll end up with dry, tough beef nuggets instead of “meat candy.”
How long does it take to smoke a brisket point for burnt ends?
A dedicated point-only cook typically takes between 8 and 10 hours depending on the weight and smoker temperature. This includes an initial 5 to 6 hour smoke to set the bark and a subsequent 2 to 3 hour braise in a foil pan. Every piece of meat is different. You must use a reliable meat thermometer rather than a clock to determine the exact finish time for your specific cut.
What is the best internal temperature for cubing brisket burnt ends?
Pull the point for cubing when it reaches an internal temperature of 88°C (190°F). At this stage, the beef is tender enough to slice but firm enough to hold its shape as uniform 2.5cm cubes. Making burnt ends from brisket point requires this structural integrity so the meat doesn’t shred or fall apart during the final braising and glazing phase in the smoker.
Do I need to wrap the brisket point during the smoke?
Wrapping is recommended once the bark has reached a dark mahogany color and is set firmly enough to pass the scratch test. Use butcher paper to maintain a crunchy exterior while accelerating the cook through the stall. If you prefer a faster render and more moisture retention for the braise, heavy-duty aluminum foil is an excellent choice for the point as it creates a more intense steaming effect.
Can I make burnt ends in a pellet grill or electric smoker?
You can achieve great results in pellet or electric units, though they often lack the heavy smoke profile of an offset smoker. To compensate, use a high-quality smoking wood and ensure your meat is dry-brined to help bark formation. The process of making burnt ends from brisket point remains the same regardless of the heat source used, provided you can maintain a steady, low temperature.
Why are my burnt ends tough even after braising?
Toughness is usually a sign that the collagen hasn’t fully converted into gelatin. This happens if the internal temperature didn’t reach the 95°C mark or if the meat lacked sufficient marbling to begin with. If the cubes are resistant to a probe, continue the braise uncovered until they reach a butter-like consistency. Always check the initial meat grade; grass-fed beef without marbling often results in a tougher finish.
What kind of wood is best for smoking brisket burnt ends?
Strong hardwoods like Australian Ironbark or Oak are the best options for beef. These woods produce a robust, clean smoke that complements the intense flavor of the point. Avoid fruitwoods like apple or cherry for this specific cook. They are often too mild to penetrate the heavy fat cap and rich seasoning required for professional-quality burnt ends. Stick to woods that offer a traditional, savory profile.
How do I reheat leftover brisket burnt ends without drying them out?
Reheat leftovers in a covered dish at 120°C with a splash of beef stock or extra BBQ sauce. This creates a small steam chamber that restores moisture without overcooking the meat. Avoid using a microwave. It causes the fat to separate and turns the bark into a rubbery mess. A low oven or a vacuum-sealed bag in a water bath will preserve the original texture and flavor of the glaze.