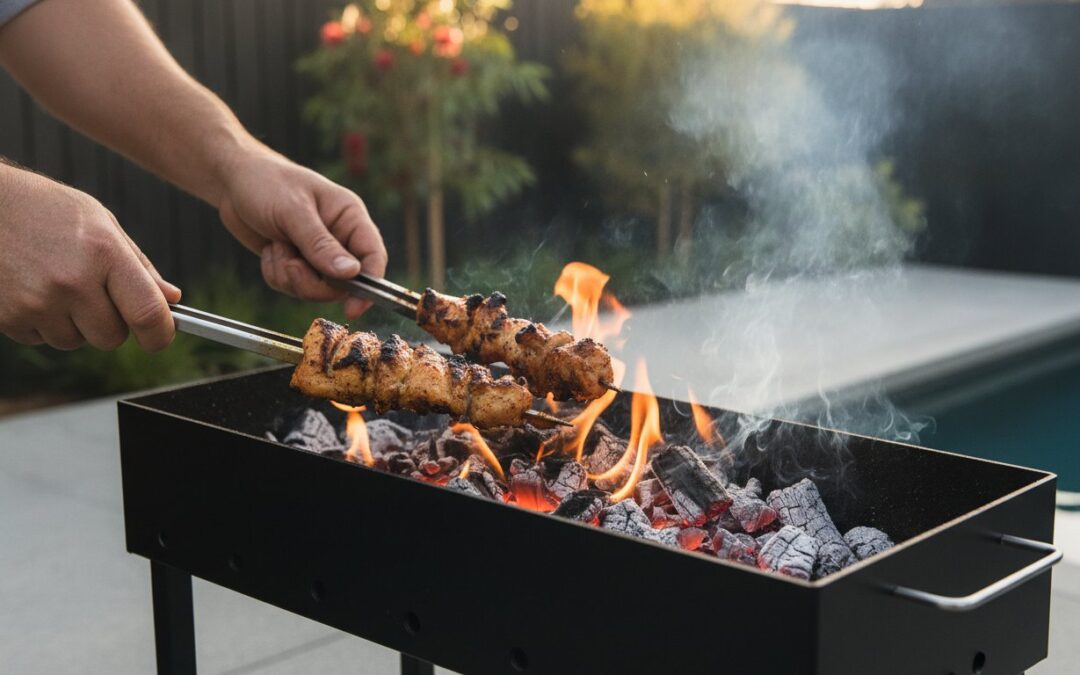
Professional-grade chicken skewers are 30% marinade and 70% fire management. You can have the best recipe in the world, but if your fuel choice is poor or your heat zones are messy, you’ll end up with dry meat and burnt sticks. Learning how to grill chicken skewers on charcoal requires more than just lighting a match. It demands a professional understanding of how different fuels, such as Hardwood Lump or Binchotan, behave under pressure.
Most home cooks struggle with chicken sticking to the grates or skewers catching fire before the meat is even cooked through. It’s frustrating to lose that authentic charcoal shop flavour because of uneven heat and poor temperature control. This guide will show you how to master heat zones and select the right fuel to recreate professional results in your own backyard. You’ll learn the technical secrets of achieving a defined charred crust while keeping the inside juicy. We’ll also break down which fuels provide the cleanest, most intense heat for a superior finish.
Key Takeaways
- Select Hardwood Lump Charcoal for traditional Aussie smoke or Binchotan for the steady, intense infrared heat found in professional kitchens.
- Discover how to grill chicken skewers on charcoal using a two-zone fire setup to prevent burning while ensuring a defined, professional crust.
- Recreate the signature “charcoal shop” aroma by managing airflow and fat vaporisation on high-intensity heat zones.
- Maintain peak performance by using heavy-duty accessories and keeping the grill surface free of old grease and ash.
Why Charcoal is the Essential Ingredient for Chicken Skewers
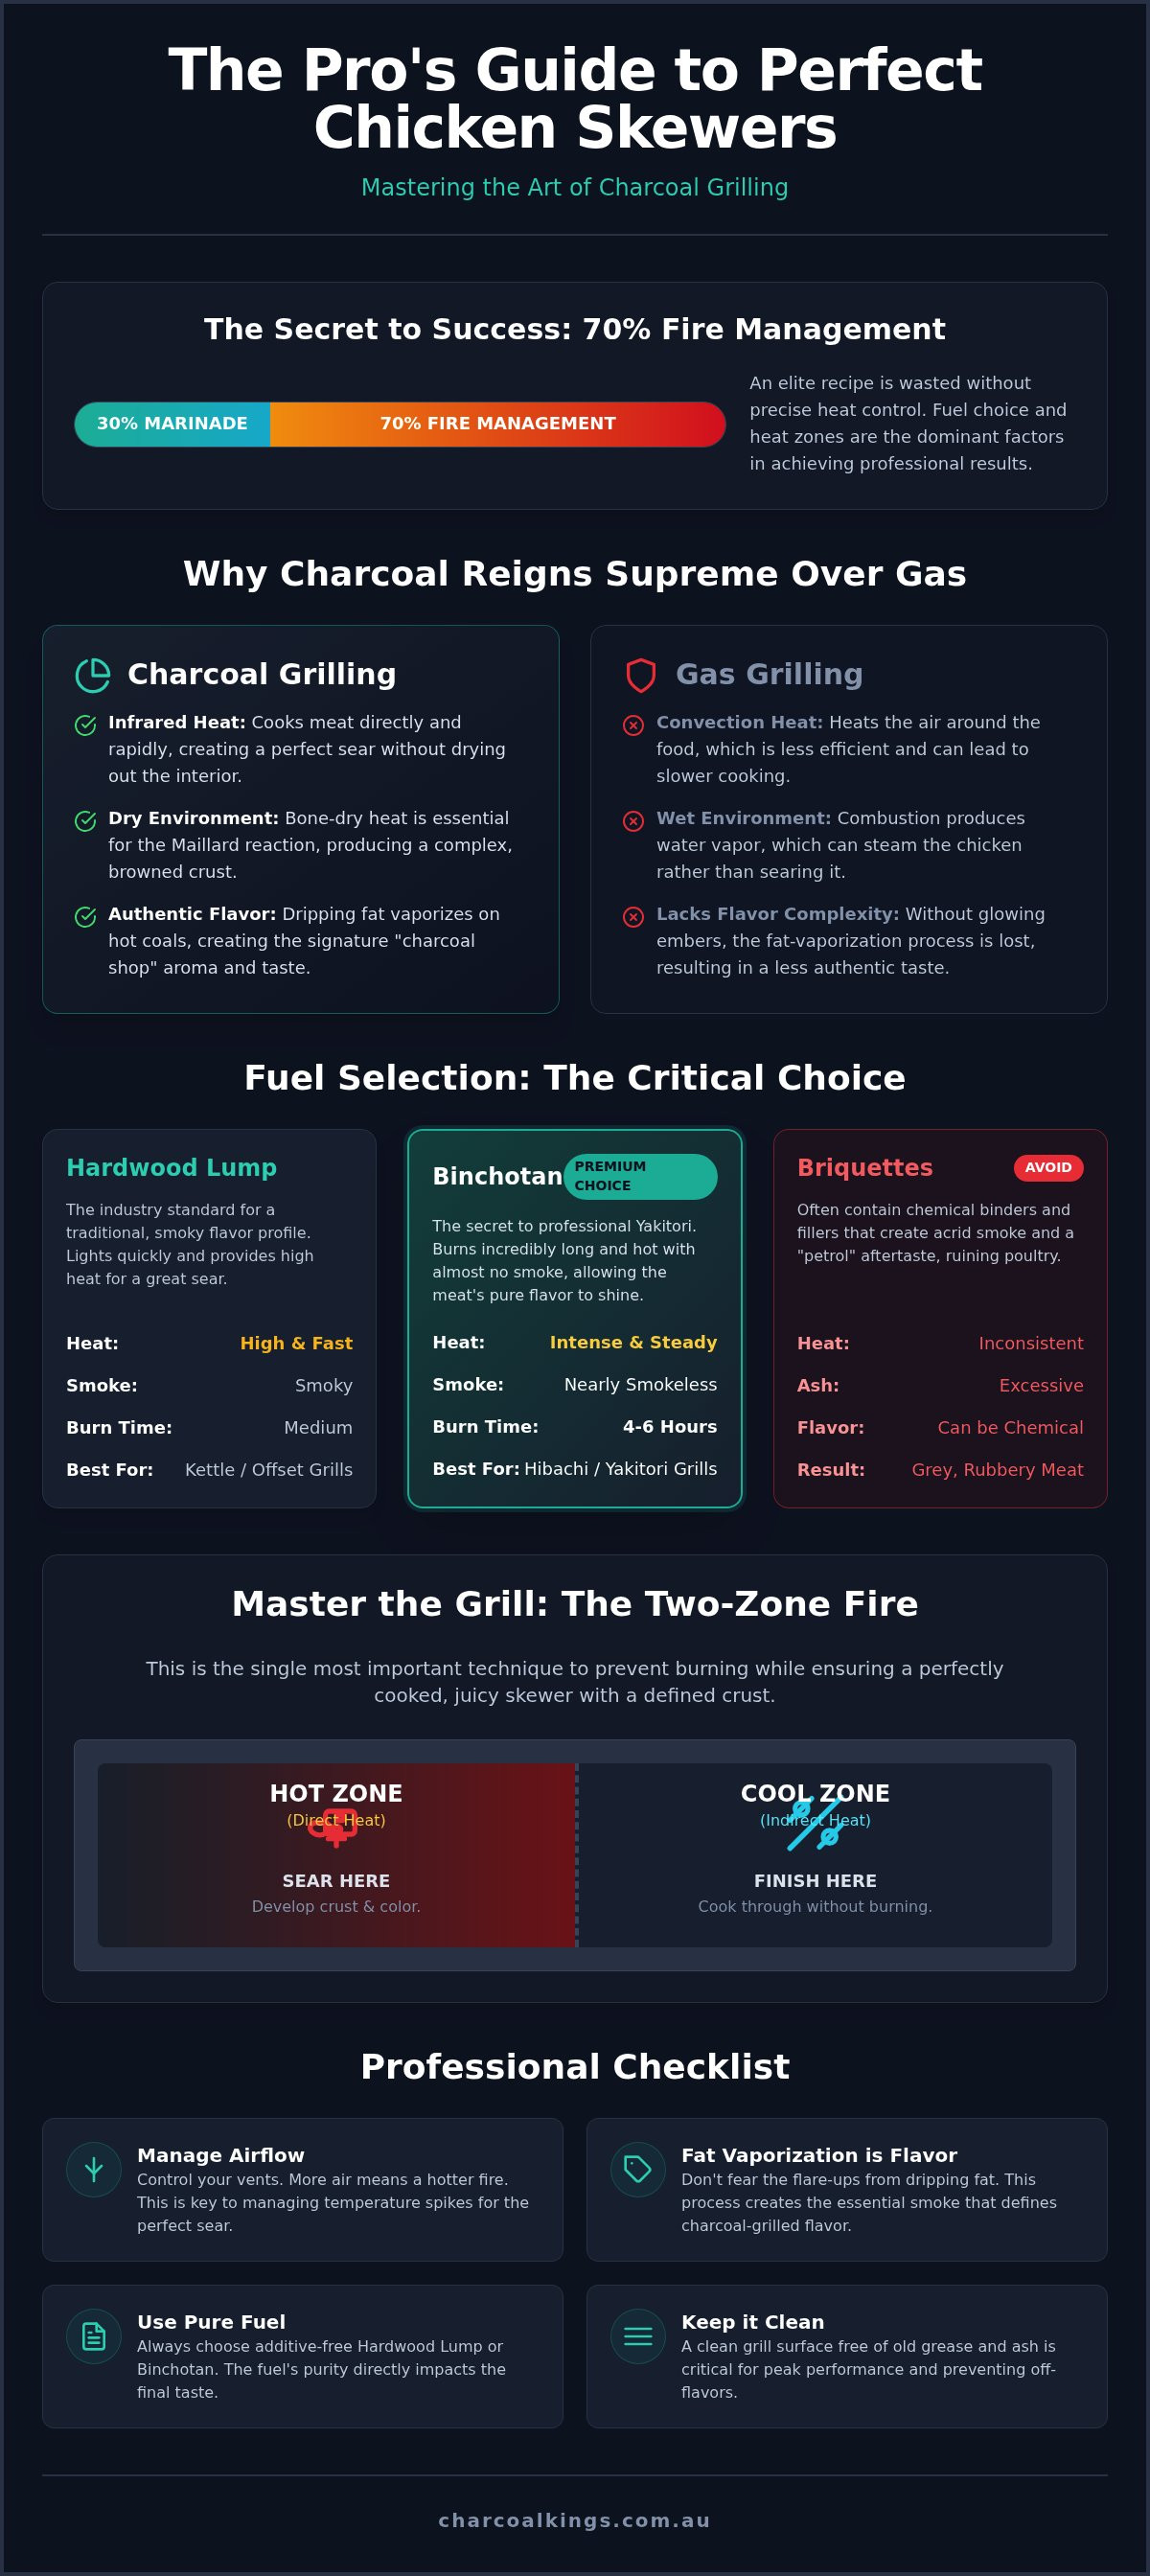
Achieving the perfect skewer isn’t just about the chicken. It’s about the fuel. When you learn how to grill chicken skewers on charcoal, you’re tapping into a high-intensity heat that gas simply cannot match. Gas grills produce a “wet” heat because water vapour is a byproduct of combustion. This often leads to “steamed” chicken rather than seared meat. Charcoal provides a bone-dry, searing environment. This is the foundation of the Maillard reaction; a chemical process where amino acids and sugars react under intense heat to create a complex, browned crust.
The signature “charcoal shop” aroma isn’t a spice or a sauce. It’s the result of fat vaporisation. As the chicken fat renders and drips onto white-hot coals, it ignites and vaporises instantly. This rising smoke coats the meat in a distinct, carbon-rich flavour that defines authentic street food. Without the direct contact between dripping juices and glowing embers, you lose the essence of the cook. This combination of salt, smoke, and high-heat searing creates the specific profile people crave from professional charcoal chicken shops.
Establishments like Beirut Grill have perfected this balance, using traditional Middle Eastern methods to deliver the authentic charcoal-fired taste that home cooks strive to replicate.
To better understand this concept, watch this helpful video:
The Role of Infrared Heat in Grilling
Charcoal emits massive amounts of radiant infrared heat. Unlike gas grills that rely on convection, which means heating the air around the food, charcoal heats the meat directly. This radiant energy penetrates the protein faster. For small pieces of chicken on a skewer, speed is critical. You want to develop a hard sear on the outside before the interior has time to dry out. It’s the difference between a rubbery skewer and a juicy, professional-grade result. Infrared heat ensures the exterior reaches the necessary 150 degrees Celsius for browning while the core remains tender.
Natural Hardwood vs. Chemical Additives
Purity is the standard for professional results. Cheap briquettes often contain fillers, sawdust, and chemical binders that produce a heavy, acrid smoke. This “petrol” aftertaste ruins the delicate profile of poultry. Professional-grade Hardwood Lump Charcoal or Binchotan provides a clean, neutral burn that lets the meat and marinades shine. Using additive-free fuel ensures that the only thing you taste is the natural sweetness of the wood and the quality of your ingredients. Purity in your fuel source is the single most important factor for achieving a clean, untainted poultry flavour.
Selecting the Ultimate Fuel: Hardwood Lump vs. Binchotan
Fuel selection dictates the success of your cook. Most home cooks fail because they treat all charcoal as equal. When you are mastering how to grill chicken skewers on charcoal, you must choose between the aggressive heat of Hardwood Lump or the surgical precision of Binchotan. The right choice depends on your grill type and the specific flavour profile you want to achieve. Standard Charcoal Briquettes are generally unsuitable for professional-grade skewers. They produce excessive ash and lack the high-intensity heat required for a fast sear. Briquettes often lead to grey, rubbery meat because they cannot reach the temperatures needed to trigger the Maillard reaction quickly enough.
Hardwood Lump Charcoal is the industry standard for traditional Australian-style skewers. It provides a rugged, smoky profile and reaches peak temperatures rapidly. Binchotan, or White Charcoal, represents the premium tier of fuel. It is the secret behind professional Yakitori. This high-density fuel burns for four to six hours, emitting intense infrared heat with almost no smoke or odour. This allows the pure, organic flavour of the poultry to remain the focus. Matching your fuel to your hardware is essential. A Hibachi thrives on Binchotan, while a Kettle or Offset grill is better suited for the high-volume airflow of Hardwood Lump.
When to Use Hardwood Lump
Hardwood Lump Charcoal is ideal for large batches and high-heat searing. This fuel is composed of pure wood pieces that have been carbonised without additives. Large, irregular lumps are superior because they create natural gaps for airflow. This airflow allows for significant temperature spikes, which are necessary for locking in juices. It is the most versatile option for those using a Kettle grill or a larger charcoal pit. For a deeper technical analysis of different fuel types, consult our guide on Charcoal: The Ultimate Guide to Fuelling Your BBQ.
The Binchotan Advantage for Skewers
Binchotan is the ultimate choice for enthusiasts seeking a clean-burning experience. It is virtually smokeless, which prevents acrid flavours from masking your marinades. The infrared heat it produces penetrates the meat deeply and evenly, ensuring the interior is cooked through while the exterior maintains a crisp crust. If you are using a tabletop Hibachi, Binchotan is the only fuel that provides the necessary longevity and steady heat. You can explore the history and performance metrics of this fuel in our article on Binchotan Charcoal: The Ultimate Guide to Japanese White Charcoal.
Achieving a professional result requires professional materials. Using high-quality Hardwood Lump Charcoal ensures your fire remains clean and consistent throughout the entire cook.
Setting Up Your Grill for High-Heat Skewers
Professional grilling isn’t about luck; it’s about geometry and airflow. To master how to grill chicken skewers on charcoal, you must move beyond a flat, unmanaged fire. A professional setup allows you to control the intensity of the heat and provides a “fail-safe” area for the meat. This level of control starts long before the chicken touches the grate. It begins with the ignition process and the physical arrangement of your fuel bed.
The Chimney Starter is the only acceptable method for lighting your fuel. It ensures 100% of your coals are lit and reaching peak temperature before they enter the grill. Never grill over “black” or unlit charcoal. Unlit fuel produces thick, acrid smoke that imparts a bitter taste to the poultry. Wait until the top layer of coals shows a thin coating of grey ash. This indicates the fuel is fully engaged and ready to provide the clean, intense heat required for a professional sear.
Managing airflow is your primary way to regulate temperature. Open your bottom and top vents fully to push your charcoal to its maximum thermal output. Oxygen is the fuel for heat. For skewers, you want the fire as hot as possible to trigger the crust formation quickly. If the fire becomes too aggressive, use the Two-Zone Setup. Bank your lit coals to one side of the grill. This creates a “Searing Zone” directly over the embers and a “Safety Zone” on the empty side. This setup allows you to move skewers away from flare-ups without stopping the cooking process.
Creating the Perfect Charcoal Bed
The distance between the fuel and the meat is a critical metric. Target a depth of 5 to 10cm from the charcoal bed to the grill grate. This proximity maximises the infrared heat penetration discussed in previous sections. Distribute the coals evenly across the searing zone to ensure the entire length of the skewer cooks at the same rate. An uneven bed leads to burnt tips and raw centres, which ruins the texture of the dish.
Essential Tools for Skewer Success
Your hardware must match the intensity of the fire. Stainless steel skewers are the professional choice because they conduct heat into the centre of the chicken and don’t burn. If you use wooden skewers, soak them in water for at least 30 minutes and shield the exposed ends with aluminium foil. Use flat-profile skewers rather than round ones. Flat skewers lock the meat in place, preventing the chicken from “spinning” when you attempt to flip it. This ensures you can sear every side of the cube with precision. High-heat gloves and long-handled tongs are also mandatory for safely managing a high-output charcoal fire.
The Grilling Technique: Timing, Temperature, and Texture
Execution on the grill is where your preparation meets the fire. Mastering how to grill chicken skewers on charcoal requires discipline in timing and an understanding of how protein reacts to extreme heat. You aren’t just heating the meat; you’re managing a series of chemical reactions to produce a specific texture. This process follows a strict sequence that ensures the chicken remains succulent while the exterior develops a professional-grade finish.
The initial sear is your first priority. Place the skewers directly over the hottest part of your charcoal bed. Leave them undisturbed for two to three minutes. If the meat sticks to the grate, it isn’t ready to flip. The chicken will naturally release once the Maillard reaction has sufficiently hardened the outer layer. Once released, rotate the skewers 90 degrees to ensure even exposure. This high-intensity contact locks in moisture by creating a protective barrier of seared protein.
Precision is mandatory for the final internal temperature. While many generic guides suggest cooking until “clear juices run,” professionals use a digital probe. Chicken thigh skewers reach their peak quality at 74°C to 75°C. At this specific range, the connective tissue has broken down into gelatin, but the muscle fibres haven’t yet begun to tighten and expel moisture. Once you hit this target, remove the skewers immediately. A rest period of three to five minutes is essential. This allows the internal juices to redistribute, ensuring the first bite is as juicy as the last. For fitness enthusiasts aiming to support their own muscle recovery, Muscle Works offers premium supplements that work alongside these high-protein meals.
Managing Flare-Ups Without Water
Never spray water on your charcoal to extinguish a flare-up. Water creates a cloud of steam and fine ash that sticks to your food, resulting in a gritty texture and a bitter, acrid flavour. If the fire becomes too aggressive, use the “Lid Method” by closing the grill vents to starve the flames of oxygen. Alternatively, use your long-handled tongs to move the skewers into the “Safety Zone” you created during the setup. Trimming excess hanging fat during your prep work will significantly reduce the frequency of these flare-ups from the start.
Achieving the “Shop-Style” Crust
The deep, complex crust found in professional shops is built through layering. During the final two minutes of cooking, apply multiple light bastes of your marinade or a finishing glaze. The sugar content in the marinade reacts with the dry heat of the charcoal to create a sticky, carbonised lacquer. A perfectly done charcoal chicken skewer displays a glossy, mahogany glaze with localized spots of dark carbonisation on the edges. This contrast between the sweet glaze and the bitter char is the hallmark of a master cook.
For the most consistent heat and the cleanest flavour profile, always use professional-grade Hardwood Lump Charcoal for your skewer cooks.
Pro Tips for Flavour Enhancement and Maintenance
Mastering how to grill chicken skewers on charcoal doesn’t end when the meat leaves the grate. Professional results depend on the cumulative effect of advanced seasoning techniques and rigorous equipment maintenance. Purity is the standard here. Every cook is an opportunity to refine the “charcoal shop” profile through strategic flavour enhancements. This requires a disciplined approach to both your ingredients and your hardware.
Advanced seasoning involves a calculated balance between dry rubs and wet marinades. Dry rubs are superior for building an initial crust and providing immediate surface flavour during the high-heat sear. Wet marinades, applied as finishing glazes in the final minutes, provide the moisture and gloss associated with high-end street food. Using both in stages allows you to manage the sugar content. This prevents early burning while ensuring a deep mahogany finish. Always apply your final glaze when the internal temperature reaches 70°C to allow the sauce to tack up without scorching.
Pairing Smoke with Poultry
Adding smoking woods to your charcoal bed introduces another layer of complexity. For chicken, subtlety is essential. Fruitwoods like Cherry or Apple are the professional choice. These woods provide a mild sweetness and impart a distinct reddish hue to the meat. Avoid heavy hardwoods like Mesquite or Hickory for skewers. These varieties produce an aggressive, pungent smoke that easily overpowers the delicate profile of poultry. For a complete breakdown of wood and fuel management, read our guide on Mastering the Art of Barbecuing with Charcoal.
Post-Cook Charcoal Care
The “Clean Grill” rule is non-negotiable. Leftover ash and carbonised grease from previous sessions will ruin the flavour of your next cook. Old grease produces acrid smoke that tastes like burnt oil rather than clean wood. Clean your grates while they are still warm using a heavy-duty BBQ scraper. This ensures the surface is ready for a high-intensity sear without sticking next time. It also prevents the buildup of carbon that can cause uneven heat distribution.
Properly extinguishing your fire allows you to reuse high-quality fuel. Close all vents on your grill to starve the fire of oxygen. This stops the combustion process immediately, preserving the remaining Hardwood Lump Charcoal for your next session. Once the grill is cold, shake the basket to remove fine ash, leaving the large, reusable lumps. This efficiency is a hallmark of a seasoned pitmaster. It saves money and ensures your next fire starts with a base of seasoned, high-performing carbon.
Stock up on premium hardwood charcoal for your next cook and experience the difference that pure fuel makes.
Master the Fire and Dominate Your Next Cook
Mastering how to grill chicken skewers on charcoal transforms a standard weekend meal into a professional culinary experience. True success in this craft depends on the purity of your fuel and the discipline of your heat management. By moving away from chemical-heavy briquettes and adopting a strategic two-zone fire setup, you ensure every skewer achieves that signature shop-quality crust without sacrificing the juicy interior. This guide has provided the technical roadmap; the final results now depend entirely on the quality of your materials.
Achieving restaurant results at home requires restaurant-grade fuel. We operate as a wholesale supplier to top Australian restaurants, delivering premium carbon that contains no chemical additives or fillers. Our local South Australian expertise is built on providing consistent, high-performance heat for professional and hobbyist pitmasters alike. It is time to stop settling for mediocre results and start cooking with authority. Upgrade your BBQ game with Australia’s finest Hardwood Lump Charcoal. Get your chimney starter ready and take control of your grill today.
Frequently Asked Questions
How long do chicken skewers take to cook on charcoal?
Chicken skewers typically take between 8 and 12 minutes to cook thoroughly on a high-heat charcoal bed. This timing assumes you are using uniform 2.5cm cubes of chicken thigh. You should rotate the skewers every 2 to 3 minutes to ensure even browning and to prevent any marinade from scorching. Always use a digital thermometer to confirm the internal temperature rather than relying solely on a timer.
Do I need to soak wooden skewers before grilling on charcoal?
You must soak wooden skewers in water for a minimum of 30 minutes before they touch the grill. This moisture prevents the wood from igniting or becoming brittle under the intense infrared heat of the charcoal. While soaking helps, it isn’t a complete guarantee against charring. For professional results, consider upgrading to stainless steel skewers which eliminate this preparation step and conduct heat more efficiently.
What is the best type of charcoal for chicken skewers?
Hardwood Lump Charcoal is the superior choice for achieving a traditional charcoal shop flavour profile. It burns hotter and produces less ash than standard briquettes, which is essential for the fast searing required for poultry. If you are using a Hibachi or seeking a clean, smokeless burn, Binchotan is the professional standard. Both options provide the high-intensity dry heat needed for a perfect Maillard reaction.
How do I stop my chicken from sticking to the charcoal grill?
Prevent sticking by ensuring your grill grates are scrubbed clean and preheated to a high temperature. When you learn how to grill chicken skewers on charcoal, you’ll find that the meat naturally releases from the metal once a proper crust has formed. Avoid the temptation to move the skewers too early. A light coating of high-smoke-point oil on the grates or the chicken itself also acts as a necessary lubricant.
Can I use charcoal briquettes for skewers instead of lump charcoal?
You can use briquettes, but they are often too cool and produce too much ash for high-performance skewer grilling. Briquettes often contain chemical binders and fillers that can impart an artificial taste to the delicate chicken meat. Hardwood lump charcoal is the industry standard because it provides the clean, intense heat necessary to sear the exterior quickly while keeping the interior juicy.
How do I know when the charcoal is ready for the chicken?
Charcoal is ready for cooking when the fuel is glowing red and covered in a thin layer of light grey ash. This usually takes 15 to 20 minutes after lighting a chimney starter. At this stage, the initial acrid smoke has dissipated, and the fuel is emitting steady radiant heat. Never place your skewers over black, unlit charcoal, as this will result in a bitter, soot-like flavour on your food.
What internal temperature should chicken skewers reach?
Chicken skewers must reach an internal temperature of 74°C to 75°C to be considered safe and perfectly cooked. Using a digital meat probe is the only way to ensure accuracy. At this temperature, chicken thighs are tender and the juices remain locked within the muscle fibres. Pulling the meat off the grill at this exact point prevents the common problem of dry, overcooked poultry.
How do I prevent the wooden ends of skewers from burning off?
Protect the exposed ends of wooden skewers by covering them with a strip of aluminium foil during the cook. This foil shield reflects the radiant heat away from the wood, preventing it from turning to ash. This technique is particularly important when you are mastering how to grill chicken skewers on charcoal at high temperatures. Alternatively, position the skewers so the wooden handles sit off the edge of the direct heat zone.