
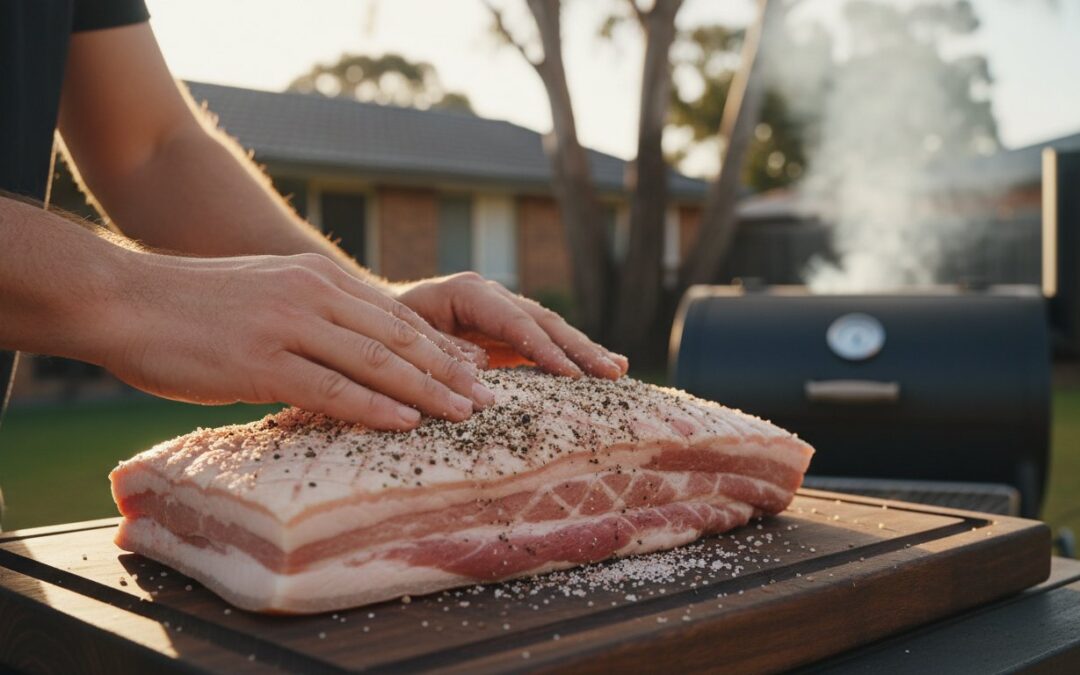
Most supermarket bacon sold in Australia contains up to 30% added water and a cocktail of synthetic accelerators that ruin the texture. You’re likely tired of bacon that shrinks to half its size in the pan or tastes more like factory chemicals than actual pork. It’s frustrating when you spend A$28 on a “premium” pack only to get inconsistent, soggy results that fail the fry test. This curing bacon at home guide eliminates the guesswork and the genuine fear of botulism by sticking to proven, science-based methods. We don’t cut corners because quality meat deserves respect.
You already know that real flavor comes from patience and the right fuel. I’ll show you how to master the art of dry-curing and smoking your own premium slabs using professional, safety-first techniques. You’ll understand the exact ratios of curing salts needed to keep your family safe while producing a result that blows any commercial product out of the water. We are going to walk through every step from choosing the right Australian pork belly to the final 6 hour cold smoke over natural hardwood. It’s time to stop settling for mediocre breakfast meat and start crafting something legendary. Get sizzlin’.
Key Takeaways
- Understand the non-negotiable science of food safety by using Prague Powder #1 to inhibit bacteria and ensure a professional-grade result.
- Learn how to source premium Australian pork belly with the ideal fat-to-lean ratio, which accounts for 90% of your final flavour profile.
- Master the high-precision Equilibrium Cure method using this curing bacon at home guide to achieve a perfect, consistent balance of salt and sugar.
- Discover why air-drying the meat to form a pellicle and using natural hardwood charcoal are essential for deep, authentic smoke penetration.
- Apply professional resting techniques and the “freezer trick” to achieve perfectly even, thin slices that rival the best craft butchers in Australia.
The Science of Curing: Why Safety Comes First
Curing is the technical process of removing moisture from meat to inhibit bacterial growth. It’s the fundamental difference between a raw pork belly and a slab of premium bacon. This curing bacon at home guide starts with the basics of The Science of Curing. Salt draws out water through osmosis, while nitrites prevent the growth of lethal pathogens like Clostridium botulinum. You aren’t just adding flavour; you’re creating a controlled environment where spoilage bacteria cannot survive. Without this chemical transformation, the meat would simply rot in your fridge.
To better understand this concept and see the process in action, watch this helpful video:
Beginners often feel hesitant about using nitrites. Don’t skip them. Prague Powder #1 is a non-negotiable safety component for home-cured meats. Some “natural” recipes suggest celery powder instead. This is a common marketing gimmick. Celery powder contains concentrated nitrates that convert to nitrites during the curing process. The chemistry is identical. Using Prague Powder #1 is actually safer because the concentration is standardised at 6.25%, whereas celery powder levels vary by batch and brand.
Salt and sugar work together to perfect the final product. Salt is your primary tool for texture. It denatures proteins, which gives bacon its characteristic “snap” and firm bite. Sugar plays a supporting role. It balances the harshness of the salt and aids the Maillard reaction during the final cook. This results in the deep mahogany colour and caramelised edges that define a high-quality rasher. When you follow a curing bacon at home guide, these two ingredients are your foundation for both safety and taste.
Understanding Prague Powder #1
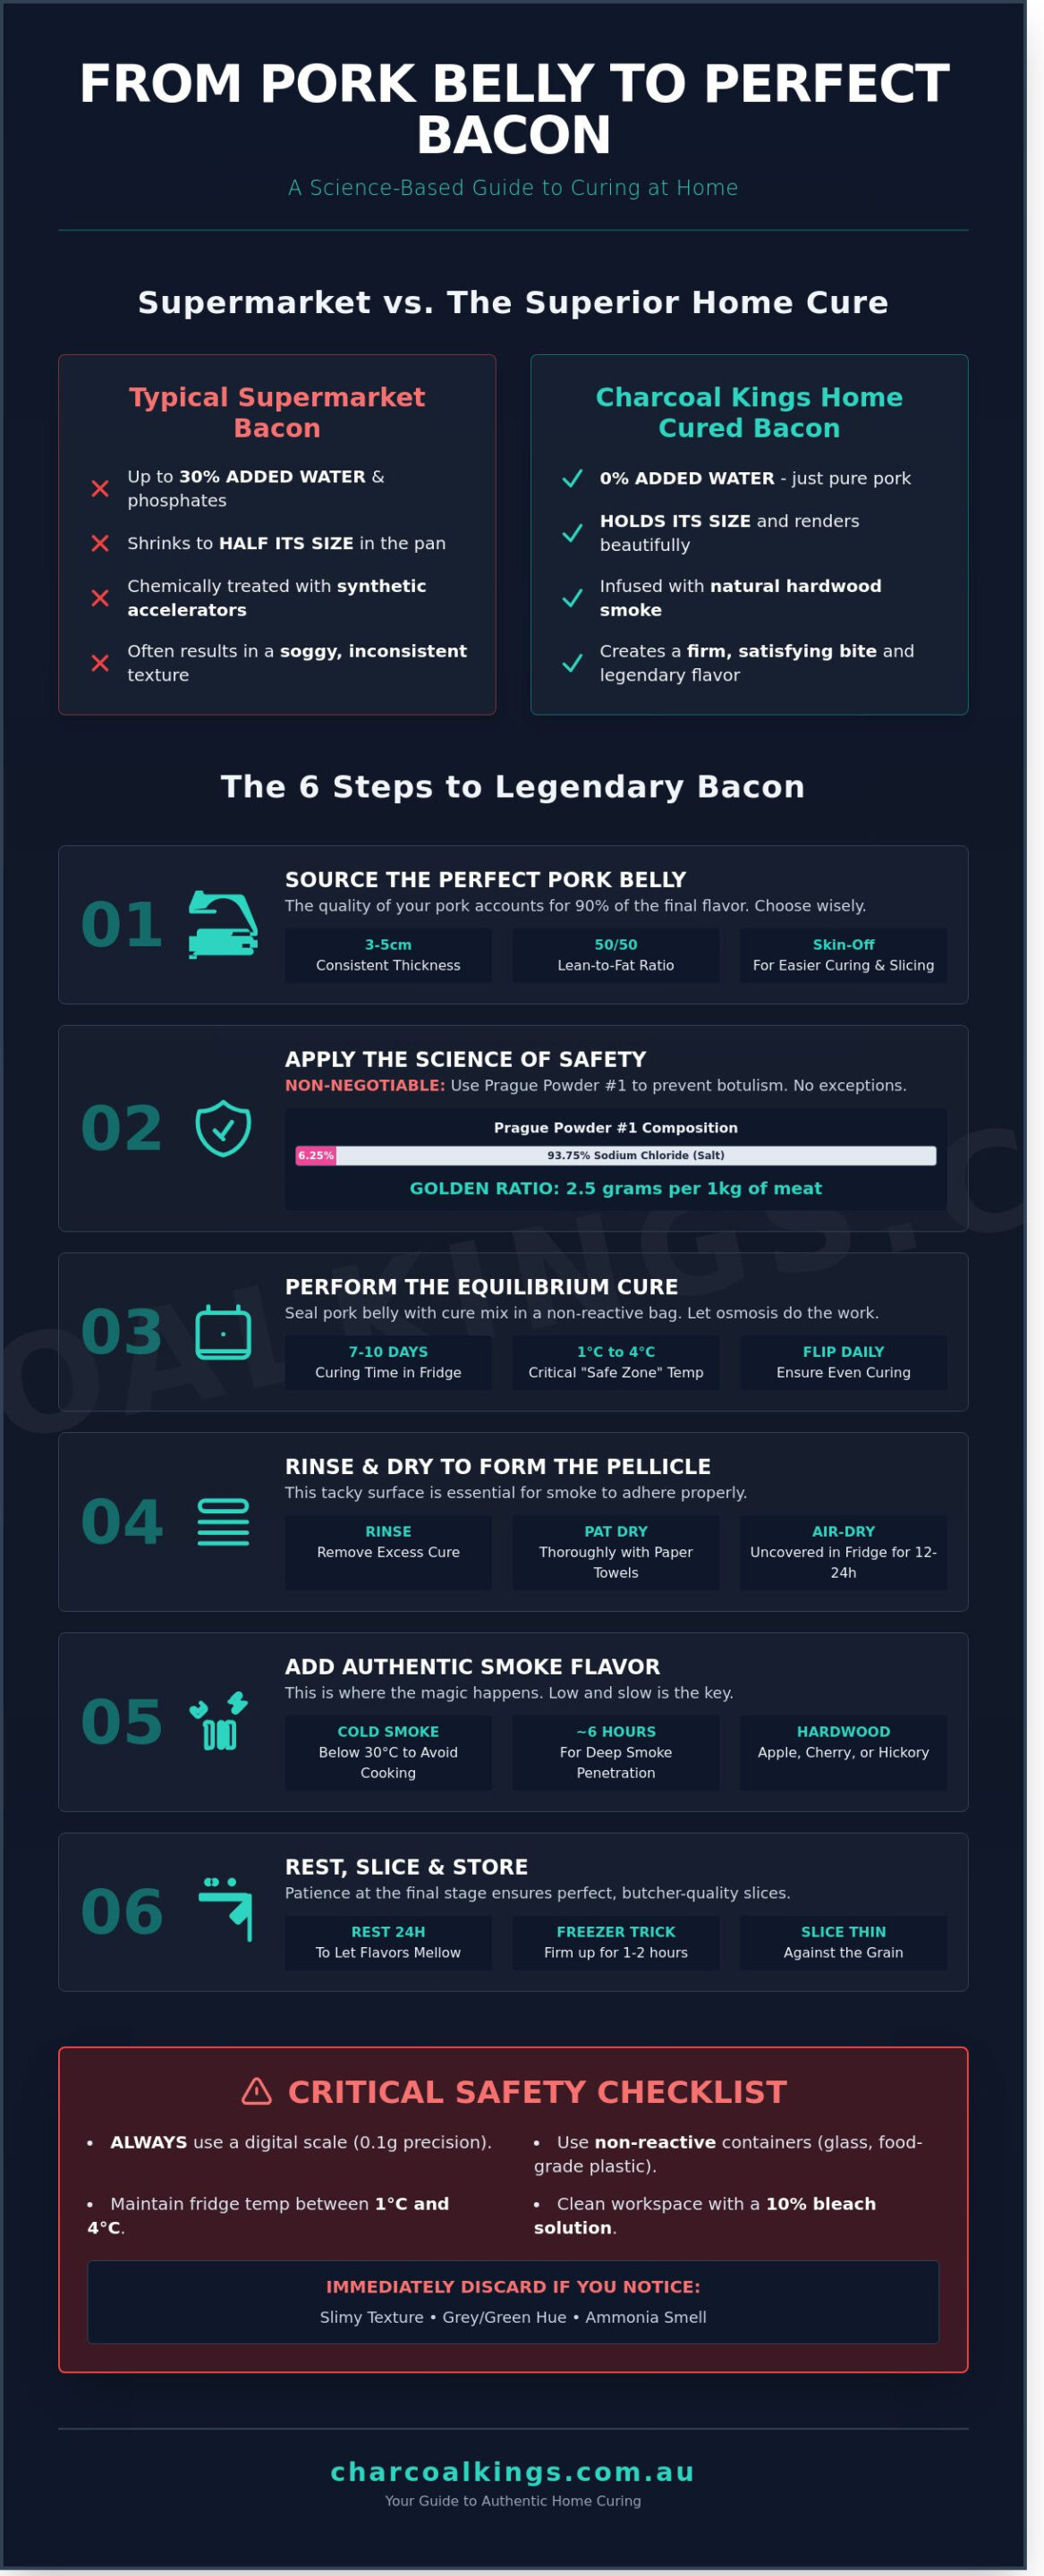
Prague Powder #1 consists of 6.25% sodium nitrite and 93.75% sodium chloride. Manufacturers dye it bright pink so you don’t confuse it with standard table salt. Using too much is toxic; using too little is dangerous. Stick to the golden ratio of 2.5 grams of Prague Powder #1 per 1 kilogram of meat. This precise dosage ensures safety without compromising the final product’s quality. Always use a digital scale that measures to 0.1 grams for accuracy.
Temperature Control and Food Safety
Your fridge is your most important piece of equipment. Keep your pork belly in the “Safe Zone” between 1°C and 4°C throughout the entire 7 to 10 day cure. Anything above 5°C allows bacteria to multiply rapidly. Sanitation is equally vital. Clean your workspace with a 10% bleach solution before you begin. Use food-grade plastic or glass containers. Avoid reactive metals like aluminium, as the salt and nitrites will corrode the surface and ruin the meat. If the belly develops a slimy texture, a greyish-green hue, or smells like ammonia, toss it immediately. A failed cure isn’t worth the risk. Get it right, stay safe, and get sizzlin’!
Sourcing and Prepping Your Pork Belly
The quality of your raw pork belly accounts for 90% of the flavor in your finished product. You cannot fix inferior meat with smoke or salt. When following this curing bacon at home guide, your primary goal is to find a slab with consistent thickness, ideally between 3cm and 5cm. A belly that tapers significantly will cure unevenly. The thin sections will become oversalted while the thick sections remain under-cured. Aim for a lean-to-fat ratio of roughly 50/50. If the belly is too fatty, it will shrink to nothing in the pan. If it’s too lean, the bacon will be tough and lack that signature melt-in-the-mouth texture.
Commercial supermarket pork is often injected with a 10% water and phosphate solution to increase weight. This is the enemy of high-quality bacon. You want “dry” pork that hasn’t been chemically treated. Choosing between skin-on or skin-off is your first major decision. Removing the skin allows the cure to penetrate the meat from both sides, which shortens the curing time by approximately 24 hours. Skin-off bacon is also much easier to slice. If you prefer a traditional English-style rasher with a tough, chewy rind, leave the skin on. Just be prepared to use a very sharp carving knife or a mechanical slicer later.
The Australian Butcher’s Checklist
In the Australian market, look for the APIQ✓ (Australian Pork Industry Quality Assurance) logo. This certification ensures the pork meets high standards for animal welfare and biosecurity. For the best results, visit a specialist butcher at the Adelaide Central Market or a local independent shop. Ask specifically for female pork to avoid boar taint, which is a pungent odor sometimes found in meat from male pigs. Standard commercial grades are fine, but heritage breeds like Berkshire or Tamworth offer superior intramuscular marbling. These breeds provide a richer flavor profile that standard Large White pigs cannot match. Expect to pay between A$18 and A$28 per kilogram for premium heritage belly cuts in 2024.
Preparing the Slab
If your pork belly still has the rib cage attached, you must remove it carefully. Use a sharp boning knife to follow the natural curve of the ribs. Keep your blade pressed firmly against the bone to prevent gouging the meat. Deep nicks in the flesh create pockets where moisture can trap bacteria. Once the ribs are out, square the slab by trimming the uneven edges. This creates a uniform rectangle that ensures even airflow and heat distribution during the smoking phase. Don’t throw away the scraps; these trimmings are perfect for salt pork or flavoring a pot of beans.
Wash the belly under cold running water to clear away any loose bone fragments or grit. Drying the meat is a critical step that many beginners skip. Use heavy-duty paper towels to pat the surface until it’s bone-dry. A wet surface prevents the cure from sticking and can lead to patchy results. Precision is non-negotiable here. Use a digital scale with 1-gram increments to weigh your meat and your cure. Never use measuring spoons. A difference of 5 grams of curing salt can be the difference between a safe product and one that’s dangerously salty. To get the best results from your premium natural curing salts, always calculate your ratios based on the exact weight of the pork slab.
Once your belly is trimmed, dried, and weighed, you’re ready to apply the cure. This preparation phase sets the foundation for everything that follows. Take your time with the knife work. A clean, squared-off slab looks professional and cooks much more predictably in the pan. Get it right now, and the smoking process will be far more successful. Get sizzlin’!
The Dry Cure Method: Ratios and Recipes
The equilibrium cure is the most reliable technique for any curing bacon at home guide. Unlike the salt-box method where meat is buried in salt and pulled out when it looks ready, equilibrium curing uses a calculated amount of ingredients based on the meat’s exact weight. This precision ensures your bacon is never too salty. It’s a foolproof approach for home enthusiasts who want consistent, professional results without the risk of ruining a premium 2kg slab of Australian pork belly.
To get started, you need a digital scale that measures to 0.1 grams. The industry standard ratio for a balanced cure consists of 2.5% sea salt, 1.5% brown sugar, and 0.25% Prague Powder #1. For a 2kg (2000g) belly, this equates to 50g of salt, 30g of sugar, and 5g of curing salt. Prague Powder #1 is essential because it contains 6.25% sodium nitrite. This ingredient prevents the growth of bacteria during the long curing process and provides that deep pink colour and distinct cured flavour. Using natural sea salt ensures no chemical anti-caking agents interfere with the process.
Timing is your most important tool. A 2kg slab requires a window of 7 to 10 days in the refrigerator. This duration allows the salt and nitrites to migrate fully to the centre of the meat. If you pull it too early, the middle remains grey and uncured. If you leave it for 12 days, the equilibrium method prevents it from becoming oversalted, but the texture might become overly firm. Stick to the 7 to 10 day sweet spot for the best mouthfeel.
The flip schedule is a non-negotiable part of the routine. Every 24 hours, you must turn the meat over. As the salt penetrates, it draws out moisture, creating a concentrated brine inside your bag or container. Flipping ensures this liquid redistributes constantly. This prevents one side of the belly from sitting in a puddle while the other side dries out, resulting in an even cure across the entire cut.
Building Your Flavour Profile
Customising your bacon is where you can outperform any supermarket product. For a classic maple and pepper profile, add 40ml of Grade A maple syrup and 15g of coarsely cracked black pepper to your base mix. If you prefer a savoury profile for cooking, incorporate 20g of granulated garlic and 10g of dried thyme. For those who want a complex, smoky edge before the meat even hits the smoker, use our specialized Rubs, Sauces & Cures. These premium blends are crafted to complement natural hardwood smoke and provide a bark that stands up to high-heat frying.
The Curing Process Step-by-Step
Applying the rub requires attention to detail. Don’t just sprinkle it on. Massage the mixture into every fold, crevice, and the skin side of the pork. Vacuum sealing is the superior method for bagging. It removes oxygen and forces the cure into direct contact with the meat fibres. If you don’t have a vacuum sealer, a heavy-duty zip-lock bag with the air squeezed out works, but check it daily for leaks.
The firmness test is the final check. After 7 days, squeeze the thickest part of the belly through the bag. It should feel stiff and resilient, much like a well-done steak. If it still feels soft or squishy like raw pork, it needs more time. Once it passes this test, rinse the slab thoroughly under cold water. This removes surface salt and prepares the meat for the drying phase. Following this curing bacon at home guide ensures your pork is safe, seasoned, and ready for the smoke. Get Sizzlin’!
The Finish: Smoking with Premium Hardwood Charcoal
Gas and electric smokers offer convenience, but they can’t compete with the flavour profile of real combustion. Using charcoal is the only way to achieve the authentic, deep-red mahogany finish seen in professional butcher shops across Australia. Gas burners produce moisture as a byproduct of combustion, which often leads to a “steamed” texture rather than a cured one. This curing bacon at home guide prioritises results over shortcuts. High-quality charcoal provides a dry, steady heat that allows the smoke to penetrate the muscle fibres deeply. It’s the difference between a mediocre breakfast and a world-class rasher.
The pellicle is your most important preparation step before the meat touches the rack. After rinsing the cure off, you must air-dry the pork in the fridge for 12 to 24 hours. This process creates a tacky, sticky skin on the surface of the meat. Smoke doesn’t bond well to wet surfaces; it slides right off. The pellicle acts as an organic adhesive for the smoke particles. If your pork feels slippery or wet, it’s not ready for the smoker. Wait until it feels like the back of a postage stamp.
Choosing Your Fuel: Lump Charcoal vs. Briquettes
For the cleanest possible flavour, Hardwood Lump Charcoal is the gold standard. It’s 100% natural wood that has been carbonised, meaning there are zero fillers or chemical binders. It burns hotter and leaves less ash than cheaper alternatives. If you’re using an offset smoker for a long 6-hour session, high-quality briquettes provide the consistent temperature control needed to avoid spikes. Never use “easy-light” charcoal. The chemical accelerants in those products will ruin your cured pork with a petrol-like aftertaste that’s impossible to remove.
Selecting the Right Smoking Wood
Your choice of wood defines the final character of the bacon. Apple and Cherrywood are the traditional Australian favourites, offering a mild, sweet finish that doesn’t overpower the pork. You can find these in our Smoking Woods range. For those who prefer a bold, “Redneck” style punch, Hickory or Mesquite provides a heavy, pungent aroma. The goal is “Blue Smoke.” This is a thin, nearly invisible wispy smoke. If your smoker is belching thick white clouds, you’re creating creosote. That’s a bitter, soot-like substance that makes meat taste like an old campfire. Keep your vents open and your fire small.
Deciding between hot and cold smoking depends on your equipment and patience. Cold smoking (under 30°C) takes days and requires a separate smoke chamber to prevent the fat from melting. Most home cooks should stick to hot smoking. Set your smoker between 95°C and 110°C. You aren’t “cooking” the bacon in the traditional sense; you’re bringing it to a safe internal temperature while infusing flavour. Use a digital probe to monitor the meat. You’re aiming for an internal temperature of exactly 65°C. At this point, the bacon is technically cooked but remains firm enough to slice thinly once chilled.
Once the meat hits 65°C, remove it immediately. Let it cool at room temperature for 60 minutes before placing it back in the fridge. This curing bacon at home guide recommends chilling the slab for at least 4 hours before slicing. Cold fat is much easier to cut than warm fat, allowing you to get those perfect, uniform strips for the frying pan.
Ready to level up your BBQ game? Shop our premium hardwood charcoal and smoking woods today and get sizzlin’!
Slicing, Storing, and Cooking Your Masterpiece
Your patience during the 7 day cure and the low-and-slow smoke session is about to pay off. However, the most common mistake beginners make is slicing the slab while it’s still warm from the smoker. Hot fat is soft and greasy; it won’t yield the clean, uniform strips you’re after. This curing bacon at home guide recommends resting your bacon in the refrigerator for at least 12 to 24 hours before your knife ever touches the meat. This cooling period allows the internal fats to solidify and the smoke profile to permeate every fiber of the pork belly.
Temperature control remains your best friend during the final stage. If you want paper-thin slices without the frustration of the meat sliding around, use the freezer trick. Place your cured slab in the freezer for 45 to 60 minutes. You aren’t trying to freeze it solid; you just want the exterior to feel firm. This temporary hardening makes the pork behave like a solid block, allowing for precise control whether you’re using a manual carving knife or a mechanical slicer.
Storage life for your premium creation is straightforward but strict. Expect your home-cured bacon to stay fresh in the refrigerator for up to 14 days. If you’ve produced a large 4kg batch, portion it out and head for the freezer. Vacuum-sealed bacon maintains its peak flavour for 3 months. Beyond that, the high fat content may begin to pick up freezer odours. Considering artisan bacon often retails for over A$35 per kilogram in Australian specialty delis, protecting your investment with proper airtight storage is common sense.
Slicing Techniques
Achieve professional results by using a 30cm Granton edge carving knife or a dedicated home meat slicer. Before you start, use a sharp utility knife to peel away the rind (the skin). It’s much easier to remove after smoking than before. If you prefer a rustic “speck” style, leave the skin on, but for standard breakfast strips, a skinless slab is the way to go. Aim for 3mm thickness for a standard bite, or go 5mm for a “thick-cut” steakhouse experience.
Don’t discard the “bacon ends” or the irregular chunks from the edges of the slab. These pieces are gold mines of concentrated flavour. Professional chefs in Sydney and Melbourne use these offcuts to base-line their pea and ham soups or to add depth to a slow-cooked ragu. Store these ends in a separate container; they represent about 10% of your total yield and shouldn’t be wasted.
Cooking Tips for Home-Cured Bacon
One immediate difference you’ll notice in the pan is the lack of “shrivel.” Commercial supermarket bacon is often pumped with up to 15% added water and phosphates to increase weight. When that water hits the heat, it evaporates, causing the meat to shrink and boil rather than fry. Your home-cured version contains zero added water. It stays the same size from the moment it hits the pan until it reaches your plate.
Start your bacon in a cold frying pan over medium-low heat. This cold-start method allows the natural fats to render out slowly, providing the “oil” for the meat to crisp up in. If you drop cold bacon into a searing hot pan, the proteins seize up instantly, resulting in a rubbery texture. Give it 8 to 10 minutes of gentle heat for the perfect balance of crispy fat and tender meat. This curing bacon at home guide ensures you get the most out of every slice.
Your journey from a raw pork belly to a smoky, salty masterpiece is complete. There’s no turning back to store-bought options once you’ve tasted the difference of natural hardwood smoke and a proper dry cure. Get Sizzlin’!
Master the Craft of the Perfect Home Cure
You’ve now got the blueprint to stop buying supermarket shortcuts and start producing professional results. Mastering this curing bacon at home guide means respecting the 7-day dry cure process and using precise salt-to-meat ratios to ensure a safe, high-quality result. Success depends on your pork belly selection and the consistency of your heat source. For a clean finish, only use 100% natural hardwood charcoal that provides a steady 4-hour burn time without chemical additives. This ensures your meat absorbs pure smoke flavor rather than synthetic fumes.
We provide the master-grade BBQ rubs and cures needed to transform raw pork into a gold-standard Australian breakfast staple. Our team offers expert Australian support for every stage of your cook, helping you navigate the technical side of nitrites and temperatures. Don’t settle for average results when you can produce artisan-level bacon in your own backyard. It’s time to fire up the pit and claim your title as a master of the craft in 2026.
Ready to start your cure? Shop our Premium Hardwood Charcoal and Curing Rubs here.
Get sizzlin’!
Frequently Asked Questions
Is it safe to cure bacon without pink salt (Prague Powder #1)?
It’s only safe if you plan to cook the meat immediately and skip the smoking process entirely. Prague Powder #1 contains 6.25% sodium nitrite, which is essential for preventing botulism during the low-temperature smoking phase. For a standard 2kg slab of pork belly, you need exactly 5g of pink salt. If you choose to go nitrate-free, treat the meat like fresh pork and cook it to an internal temperature of 71°C right away.
Can I use an oven if I don’t have a charcoal smoker?
You can use a standard kitchen oven set to 95°C to finish your bacon. While you won’t get the deep, authentic flavour provided by premium hardwood charcoal, the heat will still set the cure and cook the meat. Place the pork on a wire rack over a baking tray to ensure 360-degree airflow. Cook the slab until it reaches an internal temperature of 65°C, which typically takes about 2 to 3 hours.
What is the difference between dry-curing and wet-brining bacon?
Dry-curing involves rubbing a salt and sugar mixture directly onto the meat, while wet-brining submerges the pork in a liquid solution. This curing bacon at home guide recommends the dry-cure method for a superior, concentrated flavour and firmer texture. Wet-brining often adds 10% to 15% water weight to the pork. This extra moisture causes the bacon to splatter and shrink significantly when it hits the hot frying pan.
How long does homemade bacon last in the fridge?
Homemade bacon stays fresh for 7 to 10 days in a refrigerator kept at 4°C or lower. Since you aren’t using the heavy industrial preservatives found in Australian supermarket brands, the shelf life is shorter. For long-term storage, vacuum seal your slices and store them in the freezer at -18°C. Frozen bacon maintains its peak quality and flavour for up to 6 months without any issues.
Why is my homemade bacon too salty and how can I fix it?
Excess salt usually happens if you leave the meat in the cure for too long or use a salt ratio exceeding 3% of the meat’s weight. You can fix a salty slab by soaking it in a bowl of cold water for 2 hours before you start smoking. This process leaches out the excess surface salts. Always fry a small test piece after rinsing the cure to check the seasoning before you commit to the full smoke.
What part of the pig is bacon actually made from?
Traditional streaky bacon comes from the pork belly, the fatty section on the underside of the pig. In the Australian market, “short cut” bacon is taken from the loin, which is much leaner. A full middle rash includes both the loin and the belly fat. Most enthusiasts following this curing bacon at home guide prefer a skinless pork belly with a 50/50 fat-to-meat ratio for the best results.
Do I need to wash the cure off before smoking the meat?
You must thoroughly rinse the cure off the meat under cold running water once the curing time is complete. Leaving the salt and sugar grit on the surface results in an unpleasantly harsh crust. After washing, pat the meat dry with paper towels. Let it sit uncovered in the fridge for 12 to 24 hours to form a pellicle. This tacky surface is vital because it helps the charcoal smoke stick to the meat.
What temperature should I smoke my bacon at?
Maintain your smoker at a steady temperature between 95°C and 110°C for the best results. Use high-quality lump charcoal to ensure a clean burn and consistent heat throughout the process. Your goal is to reach an internal meat temperature of 65°C. This low and slow method usually takes 3 to 4 hours. Using a digital probe thermometer is the only way to ensure the fat renders properly without melting away.